Windows 10 is a great update over the previous versions of the OS. It has brought a major overhaul to the UI and many new features. The capability to install apps on the external storage is one of them. While this is a built-in option, it requires some steps to be followed, as the option has been buried deep down in the Settings app. Let’s see how to install programs on a pen drive or SD card in Windows 10 to save internal storage.
Steps to Install Apps on External Storage
To install Windows 10 apps on an external hard drive or storage, follow the steps below.
- Firstly, acquire either an SD Card or an external storage device, fit to be attached to your Windows 10 running machine. If you’ve succeeded in the task, quickly connect it, and scrape off all the possible useless files you find. We insist you format the drive for the best results.
- Next up, use the Start Menu to launch the Settings app.
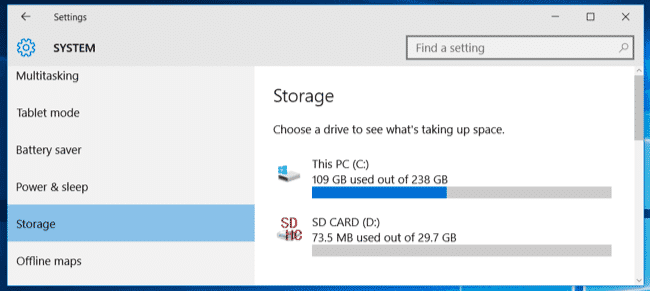
- Now, navigate to System, and click on the tab named ‘Storage‘. You can now have a visual on the drive or the SD Card you’ve mounted on your Windows 10 machine. If not, make sure your drive is functioning at its peak.

- Next, scroll down until you find the tab named ‘New Apps Will Be Installed On’, and then select your tertiary drive or SD Card as the primary drive for this task.

- Click on Apply, and call it a day!
Note that this procedure will work only for the programs you install from now on. If you simply need to shift some pre-installed programs, move the installation files to your external drive. From now on, all the programs that you install will be saved in your external SD Card or external storage. If you want to swap the right and left mouse buttons on your PC, you should read our guide on the topic.
