In this tutorial, we will discuss the steps to disable the UAC pop-up on launching Command Prompt. CMD is a handy tool for carrying out some of the PC’s most important tasks. Moreover, it is a big boon for many users who don’t like tweaking their Registry Editor. While dealing with the latter requires more effort and is quite dangerous if not done correctly, CMD does the same with just a single line of command. Apart from that, if you’re an Android enthusiast, you might know the importance of CMD while executing fastboot commands.
However, more often than not, to execute most of the tasks, you will be required to launch it as an Administrator. Well, that is quite understandable. But what more often than not irritates me is the User Access Control (UAC) pop-up that appears every time we launch CMD as an admin. Since I have already logged in as an Administrator, I wish this extra step could be done away with. Fortunately, that is very much possible. Today, we will show you how to disable this UAC pop-up while launching Command Prompt as an admin.
Disable UAC on Launching Command Prompt
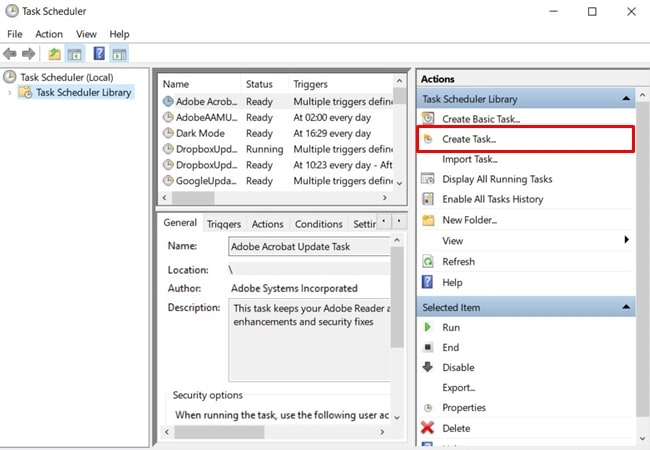
- Head over to the Windows Search menu and launch the Task Scheduler program.
- From the Actions menu situated on the right, click on Create Task.
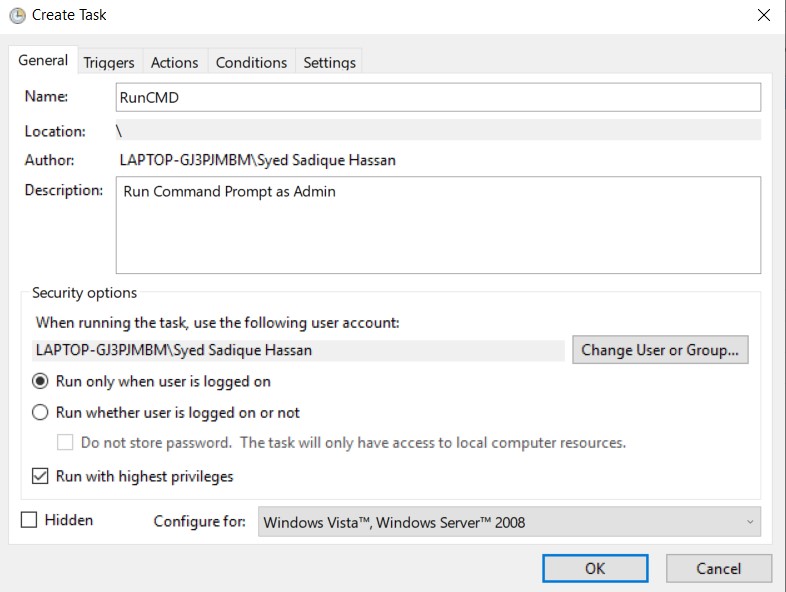
- You will now be taken to the General tab. Enter RunCMD in the Name field and Run Command Prompt as Admin in the Description section (optional). Also, in the Security options, tick-mark the “Run with the highest privileges” feature.
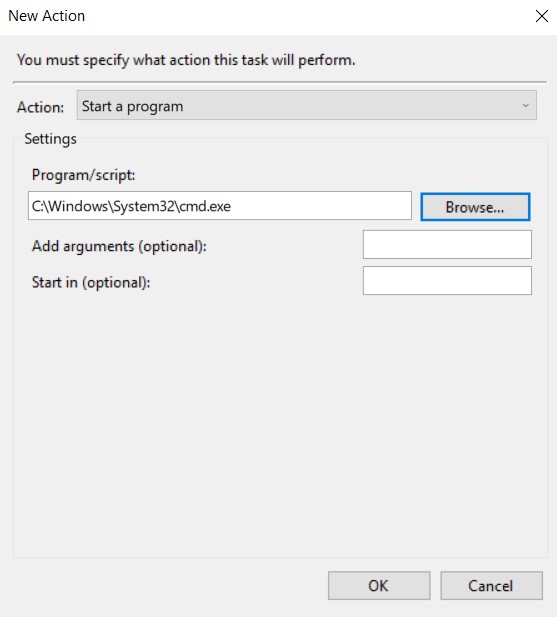
- Next, go to the Actions tab, click New, and point this scheduler to the application’s .exe file. For that, click Browse and navigate to C:\Windows\System32. Select the cmd.exe file and hit OK.
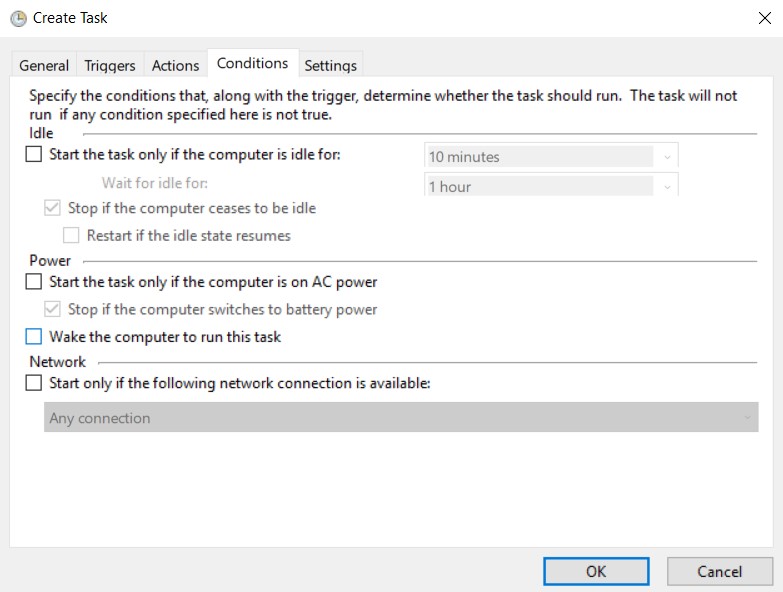
- Head to the Conditions tab and uncheck the option under the Power section that reads “Start the Task Only If the Computer Is on AC Power.”
Finally, click OK to create this task. This was the first half of this guide. Let’s proceed with the rest of the instructions. Moreover, using Task Scheduler, you could also automatically open any app at a designated time on Windows.
Creating a CMD Shortcut
- Now that we have created a task, it’s time to create a desktop shortcut and assign it to the newly created task. To do so, head to your desktop, right-click, and select New > Shortcut.
- You will now have to assign the task to this shortcut. The general command is-
schtasks /run /tn "<taskName>"
- Since the name of our task is RunCMD, our code transforms to:
schtasks /run /tn "RunCMD"
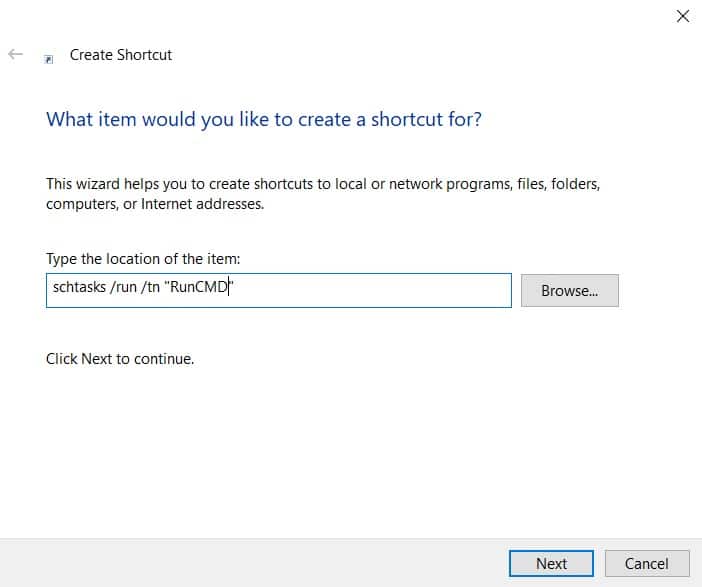
- Click Next once you input this location. Finally, give this shortcut a name: Run CMD as Admin.

- That’s it. Just double-click the shortcut and you’ll see the CMD window open in no time, without the User Access Control pop-up.
So with that, we conclude this guide on how to disable the UAC dialog box while launching the Command Prompt window. If you’re having trouble handling the task schedule? Drop your queries in the comments section below. And stick with us for more such Windows 10 tips and tricks.
Read next: 5 Hidden Windows 10 Tricks You May Not Have Known About