In this tutorial, we’ll see how we can customize the Control Center on iOS 11+ by adding additional shortcuts and recording screens on iPhone and iPad (iOS 11+).
The Control Center was introduced in iOS 7 way back in 2013 with the introduction of the iPhone 5S. The Control Center was part of the major revamp of the iOS operating system that year. The iOS 7 brought an all-new design and typography for the user interface. Everything from icons, fonts, and wallpapers to UI interactions like the swipe (from the left edge) to go back gesture and a new card-based multitasking interface was all new from the ground up. One thing worth mentioning is that the Control Center is translucent so it adapts to the background or app open behind it which is a visual treat.
Fast forward to iOS 11 and Apple redesigned Control Center which looks and feels even better to use than ever before. Now, you have neatly laid out buttons for each specific function that are easy to use thanks to their size and shape. Also, The brightness slider can now be 3D touched to bring up the switches to enable or disable Night Shift and True Tone Display (supported iDevices). Perhaps, the biggest change which isn’t noticeable at all at first is that you can add or remove more buttons or shortcuts to the control center by going to Settings > Control Center > Customize Controls.
Keeping in mind the topic of this article, today, let’s see how to add additional shortcuts to the Control Center. Also, we will look at how to use the screen recording feature introduced by Apple in iOS 11.
How to add/remove shortcut buttons to and fro the Control Center
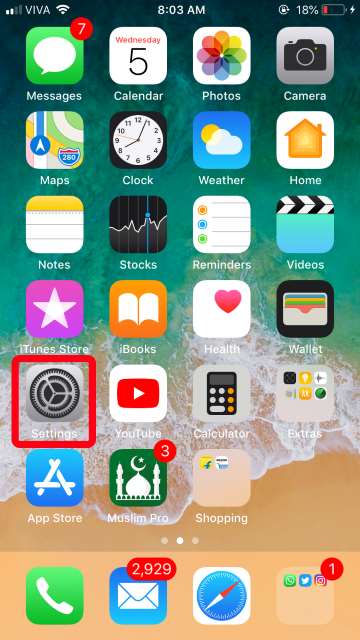
- On the home screen, locate and tap Settings.
2. Scroll down a bit to find Control Center and tap it.
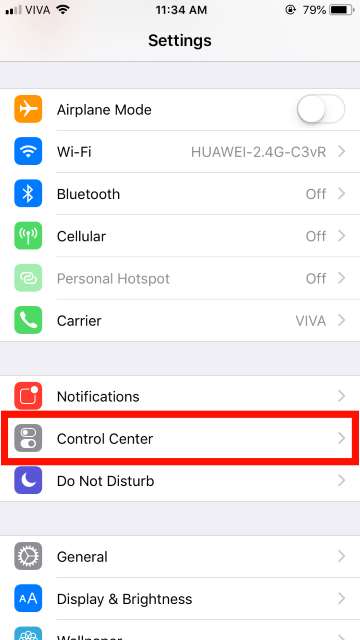
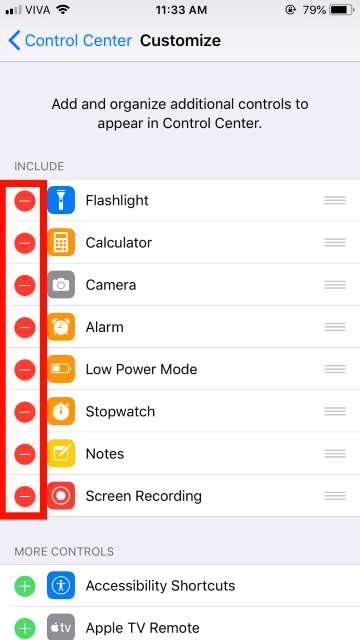
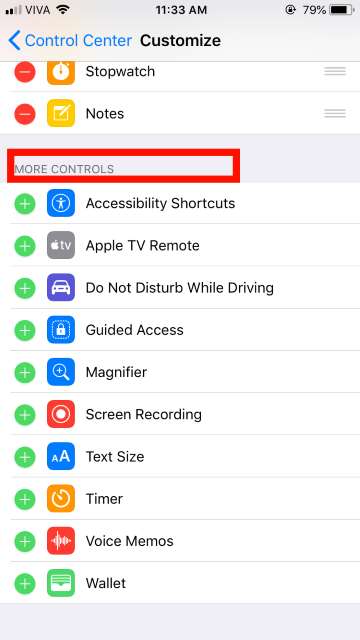
3. Next, tap Customize Controls (may differ on the iPad). Now you will be presented with two sections namely INCLUDE and MORE CONTROLS. As the name implies, the former consists of buttons you have selected to appear in the Control Center and the latter consists of all the available buttons that can be added to the Control Center.

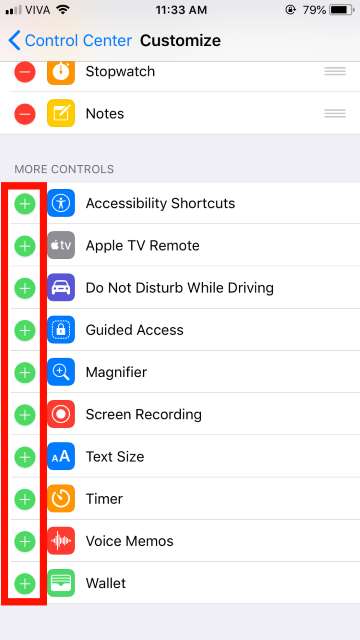
4. To add a button to the Control Center, scroll down to the MORE CONTROLS section and tap the ‘+’ icon for any given feature. (Hint: The Screen recording shortcut button is only available here, more on that in a bit).
5. Upon adding the buttons, they now appear in the INCLUDE section. Here, you are provided with the ability to re-order the buttons you add to your preference and liking.
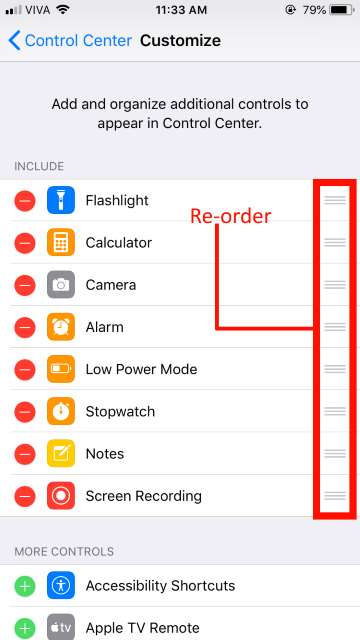
6. Quite naturally, to remove shortcut buttons from the Control Center, tap the ‘–‘ icon, similar to what you had done in step 4.
How to record the screen on your iPhone and iPad
1. To add the Screen Recording button to the Control Center, dive into Settings > Control Center > Customize Controls, scroll down and locate the MORE CONTROLS section, and then add the screen recording shortcut button by tapping the ‘+’ button.
2. Launch the Control Center on your iOS 11 device (guess, we don’t have to teach you that!), tap the Screen Recording button and now a 3-second countdown appears on the button, after which the screen starts recording. Speaking of which, the status bar turns RED to indicate to the user that screen recording is in progress.
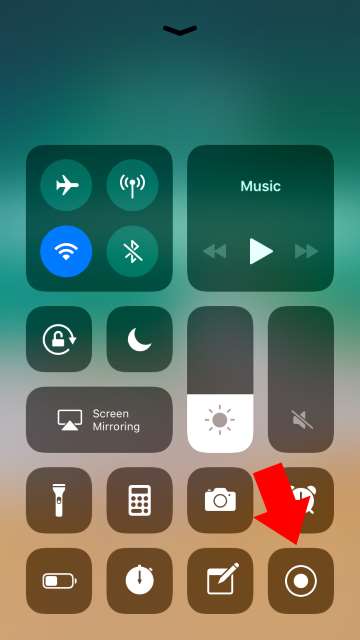
3. To stop recording the screen, launch Control Center and tap the Screen Recording button again OR tap the status bar once and then you will be asked to confirm to stop screen recording.

And there you go Apple fans and iSheeps on a brief guide on how to customize the Control Center and utilize the screen recording feature on iPhones and iPads running iOS 11 and up. Feel free to chime in the comments if you have any questions regarding the tutorial detailed above.