If you’re an advanced Windows user, you might need to use the Command Prompt sometimes. What would you do if you launched the CMD window, typed the command, pressed Enter, but nothing happened? If the commands don’t work in the Command Prompt on your Windows PC, we’ve some working solutions to fix the problem.
When the problem occurs, you’ll see the following error message in the Command Prompt window.
'ipconfig' is not recognized as an internal or external command, operable program or batch file.

Fixing the Command Prompt Not Opening Issue
1. Open the Command Prompt from the CMD Executable
There are several ways to open the Command Prompt. However, if you can’t launch it from the Windows Start menu, try other ways.
- Open the File Explorer on your PC.
- Navigate to C:\Windows\System32 or C:\Windows\SysWOW64\. You can paste one of these paths into the File Explorer’s address bar and hit the Enter key.
- Look for cmd.exe in the System32 directory.
- Right-click the file and select Run as administrator from the context menu to launch CMD with admin privileges.
If the File Explorer method doesn’t work, try the next one.
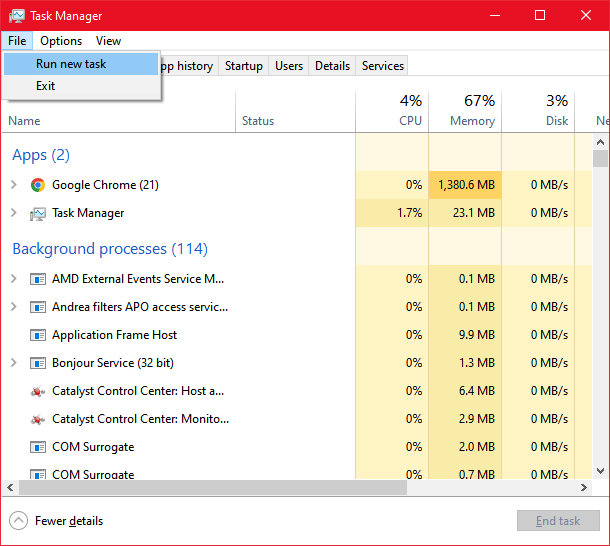
2. Launch CMD from Task Manager with Admin Privileges
There are 2 ways to launch the Command Prompt as an administrator via the Task Manager.
- Open the Task Manager using the Ctrl + Shift + Esc keyboard shortcut.
- Click File > Run new task.
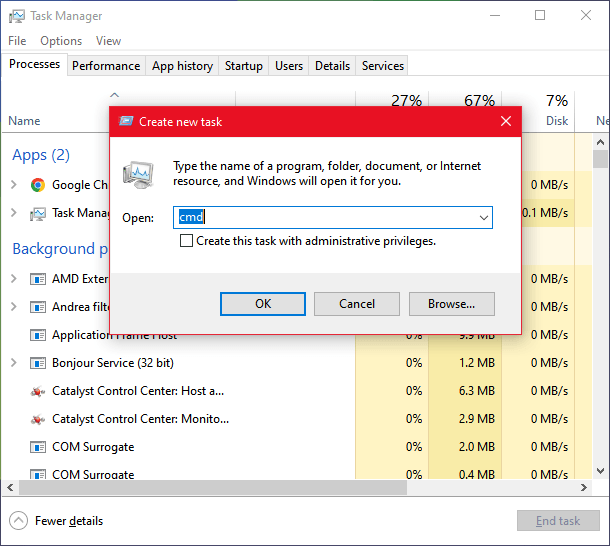
- A new pop-up window entitled Create new task will appear.
- Type ‘cmd’ in the text area, select the Create this task with administrative privileges option, and click the OK button. The Command Prompt window should open.
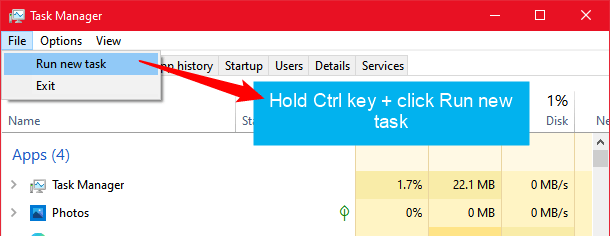
Alternatively, you can open the Command Prompt as an administrator by holding the Ctrl key while clicking the File> Run new task option.
3. Run SFC Scan via PowerShell
SFC (System File Checker) scan in PowerShell checks the integrity and stability of the Windows operating system. It safeguards against potential software errors and security vulnerabilities arising from compromised system files.
If the Command Prompt opens and closes immediately in Windows 10 or 11, it may be due to a corrupt or missing system file. An SFC scan can repair those files. This method can also help if the Command Prompt is not showing the output when you run a command.
- Launch PowerShell as an administrator.
- When the PowerShell window pops up, type the following command and press the Enter key.
sfc /scannow
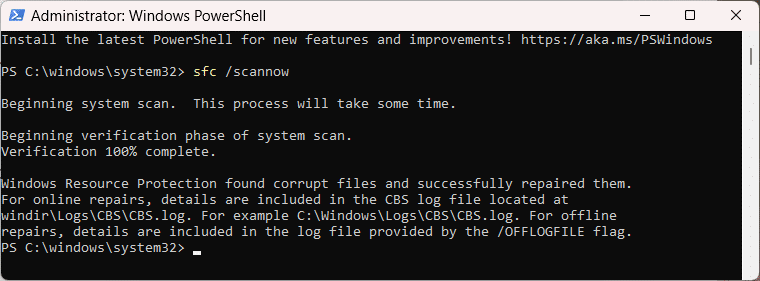
- The command will identify and repair corrupted files. When the scan is complete, close PowerShell and try opening the Command Prompt.
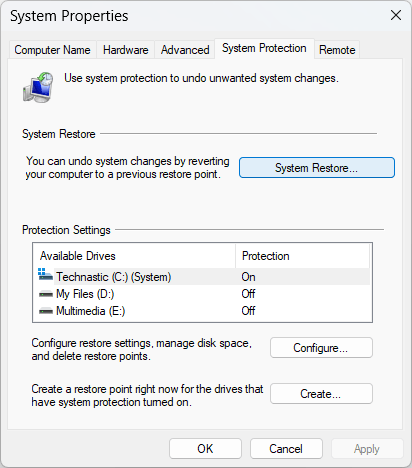
4. Create a System Restore Point
Since I keep testing things on my Windows PC, I sometimes run into trouble, and in that case, performing a system restore is my first resort. If you remember creating a system restore point when the Command Prompt was working fine on your computer, you can restore all settings and undo the recent changes to your computer.
- Type “create a restore point” in the search box located in the Windows Start menu and click the Create a restore point option.
- Then click the System Restore > Next button.
- You’ll now have the list of all the system restore points you created. Select the restore point and click the Next button.
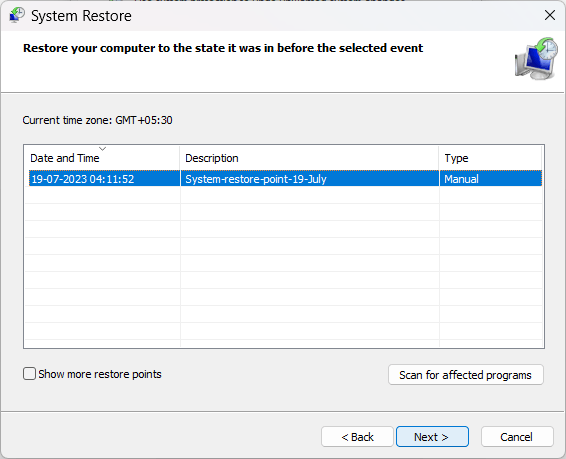
When your PC is restored, try running the Command Prompt. If you cannot open and use the Command Prompt, try the next potential fix to resolve the issue.
Fixing the Command Prompt Not Working Error
Try the following solution if the Command Prompt opens normally but you can’t execute a command.
Edit Path System Environment Variable
If you get the command not recognized error in the Command Prompt, it may be due to a path variable missing on your computer. Once you add that variable, the Windows Command Prompt will start working again. Here is how to change or edit the environment variables.
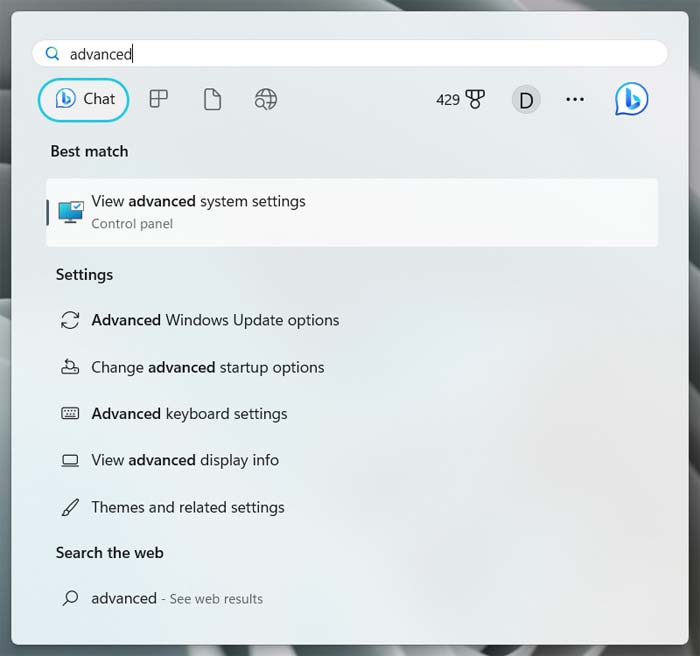
- Click the Windows icon to open the Start Menu.
- Type “advanced system settings” in the search field and select View advanced system settings.
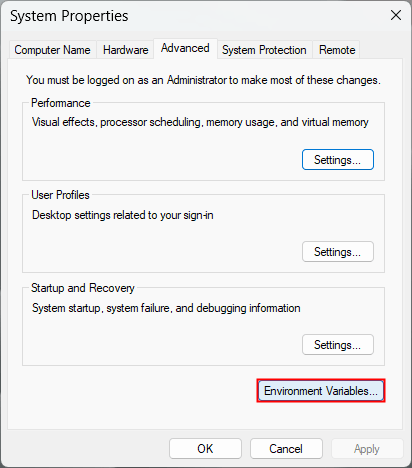
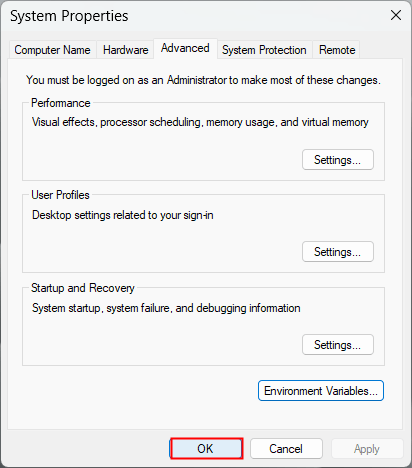
- The System Properties window will pop up. Click the Environment Variables button.
- A new window showing the list of all existing variables will appear.
- Look for the Path variable entry under the System variables pane. Make sure that the value of Path is
C:\windows\system32. In my case, it was set toC:\Technastic\platform-tools, and so I could not execute any command in the Command Prompt. In some cases, the path variable might be missing.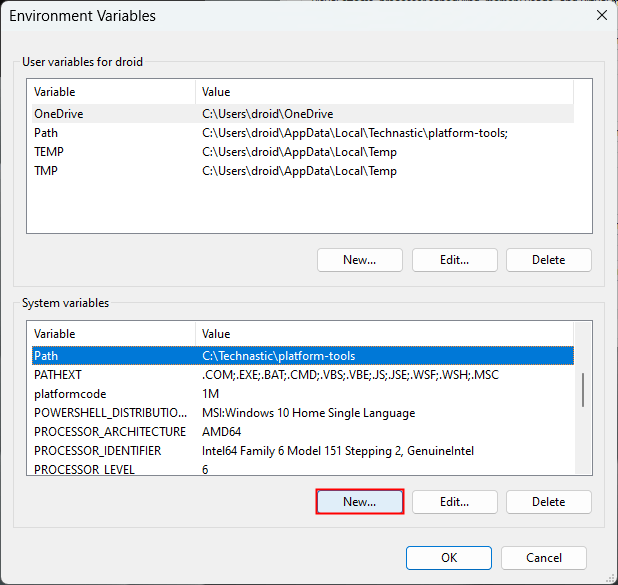
- If the path variable is missing, click the New… button below the System variables pane. In case the value of the path variable differs from the one mentioned above, select the Edit… button instead.
- Set the variable name to ‘Path‘ and the variable value to
%systemroot%\system32,C:\windows\syswow64\, orC:\windows\system32.
- Then click the OK button to save your changes. Also, click OK in the Environment Variables and the System Properties window.
- Restart your Windows PC, launch the Command Prompt, and try executing any command. The Command Prompt should work fine now! Having made the above changes in the path variable, I could use the
ipconfigand other commands normally.
The above solutions should solve the command not working error in the Command Prompt on your Windows PC. If all else fails, it may be necessary to reinstall or repair Windows itself.
Read Next: 250+ Keyboard Shortcuts for Windows 10/11