Microsoft is introducing Windows Ink workspace tools in its Windows 10 Anniversary update. The main idea behind Windows Ink Work Space tools is to provide better handwriting options for it touch screen users for inputting drawings. Also, the users can take screenshots and can edit them simultaneously. Windows Screen sketch will be available to all the Windows 10 users.
Windows screen sketch is actually a combination of a two features which were already present in the previous windows operating system. The two features like screenshot taking and highlighter options are combined as Window screen sketch under Windows Ink workspace category. Let’s see how to use windows screen sketch to take screenshots and edit them simultaneously.
How to Use Windows Screen Sketch in Windows Ink Work Space
Before proceeding further, Windows Ink workspace should be enabled first.
Enable Windows Ink workspace
The easiest way to enable windows screen sketch is to right click on the taskbar and select Show Windows Ink Work Space Button option to enable. You can now see a tick mark if it is enabled.
Or you can also enable Windows ink workspace by going to Settings > Personalisation > Taskbar and the under notification area, we can see the Turn System icons ON or OFF option.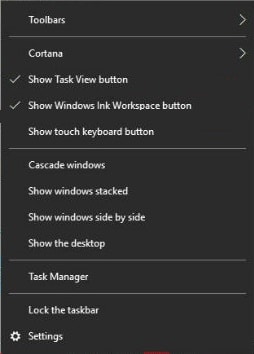
Once the Windows Ink workspace is enabled, you can see a new icon in the taskbar. Now click on the icon to view the options. A menu will appear with the options in Windows Ink workspace.
You can see three options (Sticky notes, Sketchpad, and Screen sketch) in the Windows Ink workspace.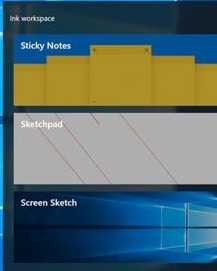
Most of the users might be aware of the uses with Sticky notes since it is available in the previous versions of windows. Sticky notes help users to take simple notes. In this update, Cortana is also integrated into it.
Sketchpad can be used to handwriting and draw inputs. It is mainly useful for touchscreen device users. The screenshots have to be taken from here before editing them in Screen sketch.
Screen sketch will open the screenshots of the present screen along with the tools like Pen, Pencil, and Highlighter with different colors. These tools can be used to write, highlight and markup the required portions in the screenshot. A crop button is also present to adjust the height and width of the screenshot. After all the required changes are made and saved, the final output can be saved, copied or shared using various options.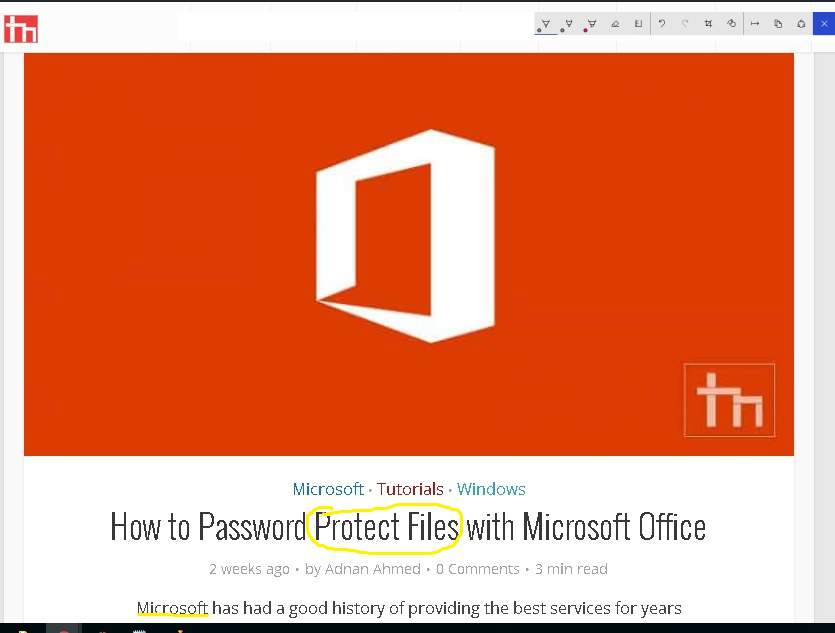
With Screen sketch, the manual process of taking a screenshot and editing it in paint or other editing apps is now simplified.
So how do you feel about this new feature in Windows 10 update?
If you find this tutorial useful, do share it with your friends. Let us know your suggestions in the below comments section.