Windows 10 Timeline is the biggest feature introduced with the Windows 10 April 2018 Update. If you’re not aware, Microsoft has promised to release two major updates to Windows 10 each year. This is quite similar to how Canonical releases Ubuntu updates, but not the same. The timing for these updates is also somewhere around the same time as Ubuntu. On April 26, Canonical released Ubuntu 18.04, and four days later it was Microsoft’s turn. Neither of the OS updates is yet made available for users, even though they’re out. This is to ensure that most bugs are squashed by the time the updates roll out to the masses.
Microsoft has said the global rollout will begin starting May 8 via Windows Update. Most users can expect to see the new update after that. We’ve previously discussed the Windows 10 Timeline feature in detail. Back then it was only available to Windows insiders as the company was working on its development. Months later, the feature is now available for everyone with the Windows 10 April 2018 update. In essence, Timeline is like the recent app list on your smartphones but a little more. It remembers not only which app you were using but also why. For instance, what file were you working on when using Microsoft Word last night?
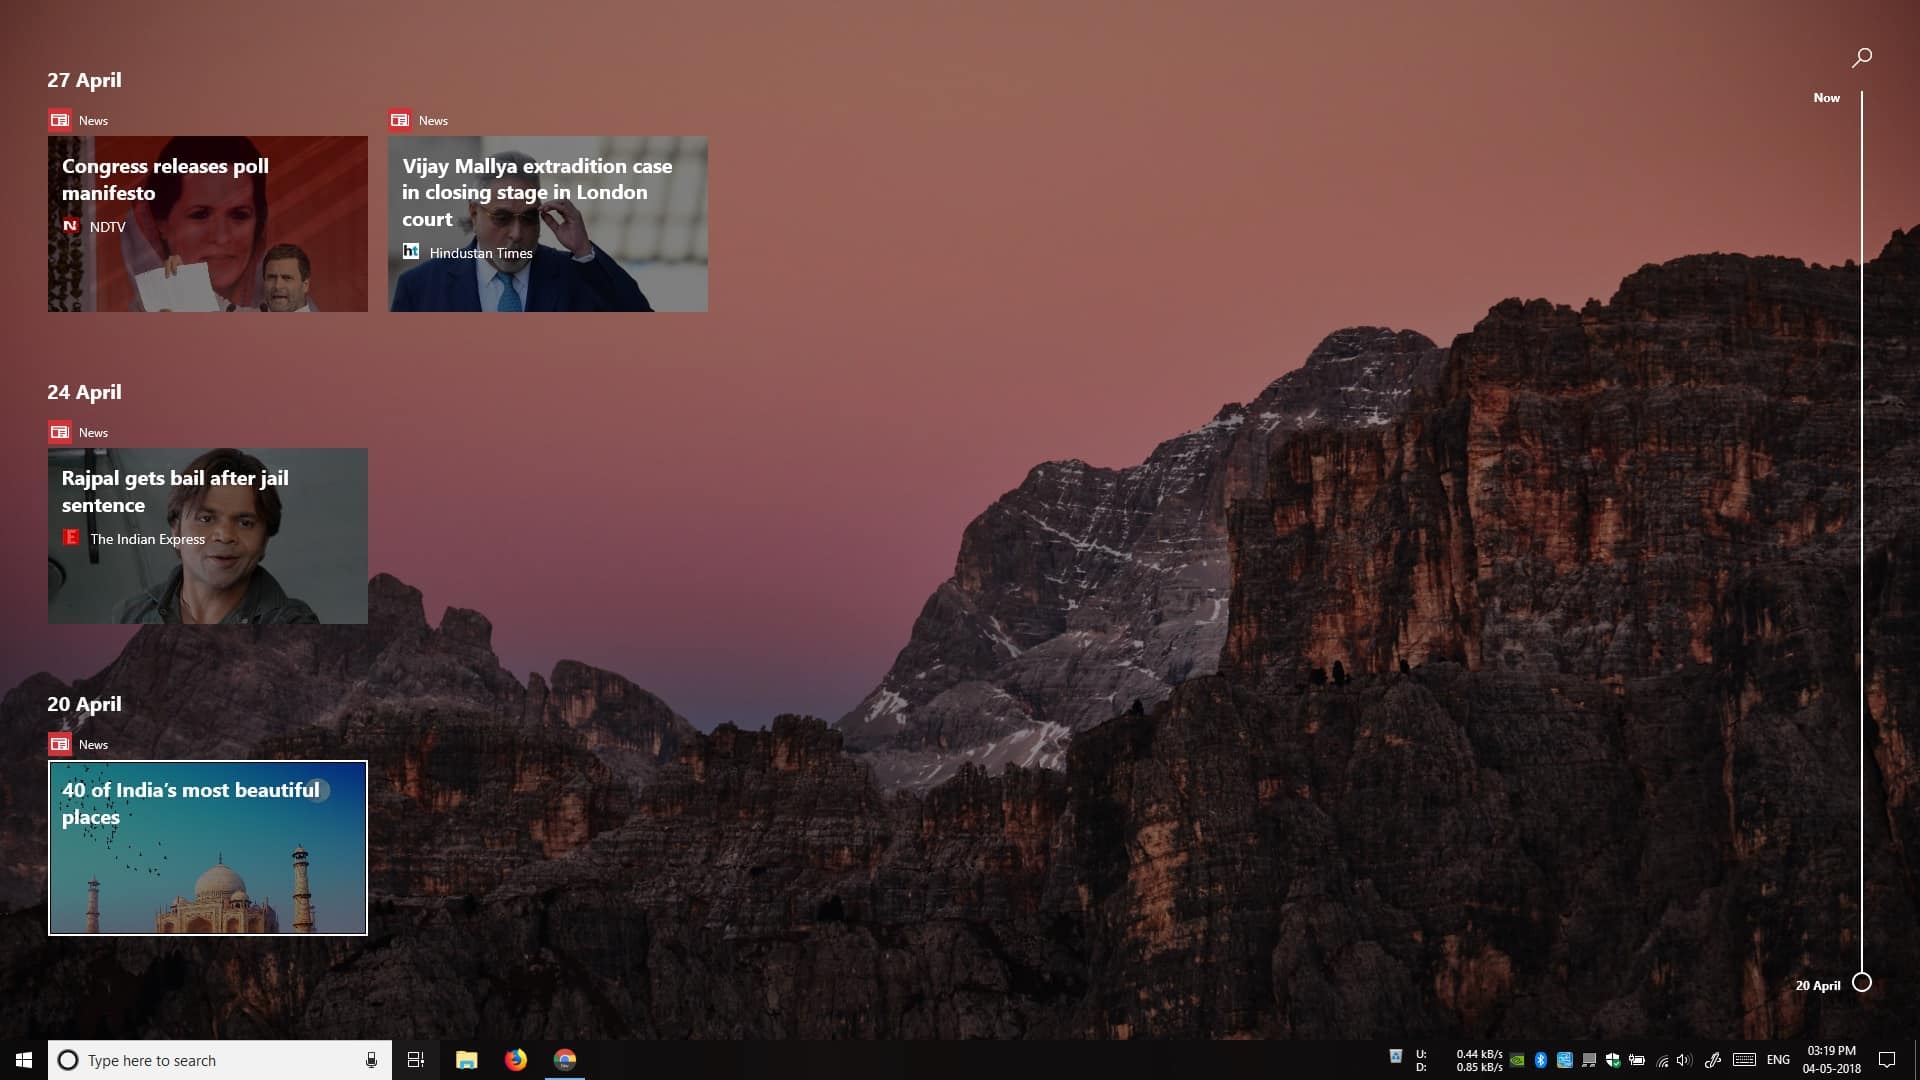
It is all there on the Timeline and when you click on Word, it should open right in the document you were working on. Take for instance my very pre-mature Timeline in the screenshot above. On April 20th, I was reading an article on the Windows 10 News app titled 40 of India’s most beautiful places. I clicked on it and even though the News app was closed, the PC turned off several times since April 20th, it takes me right back to that article on the News app. 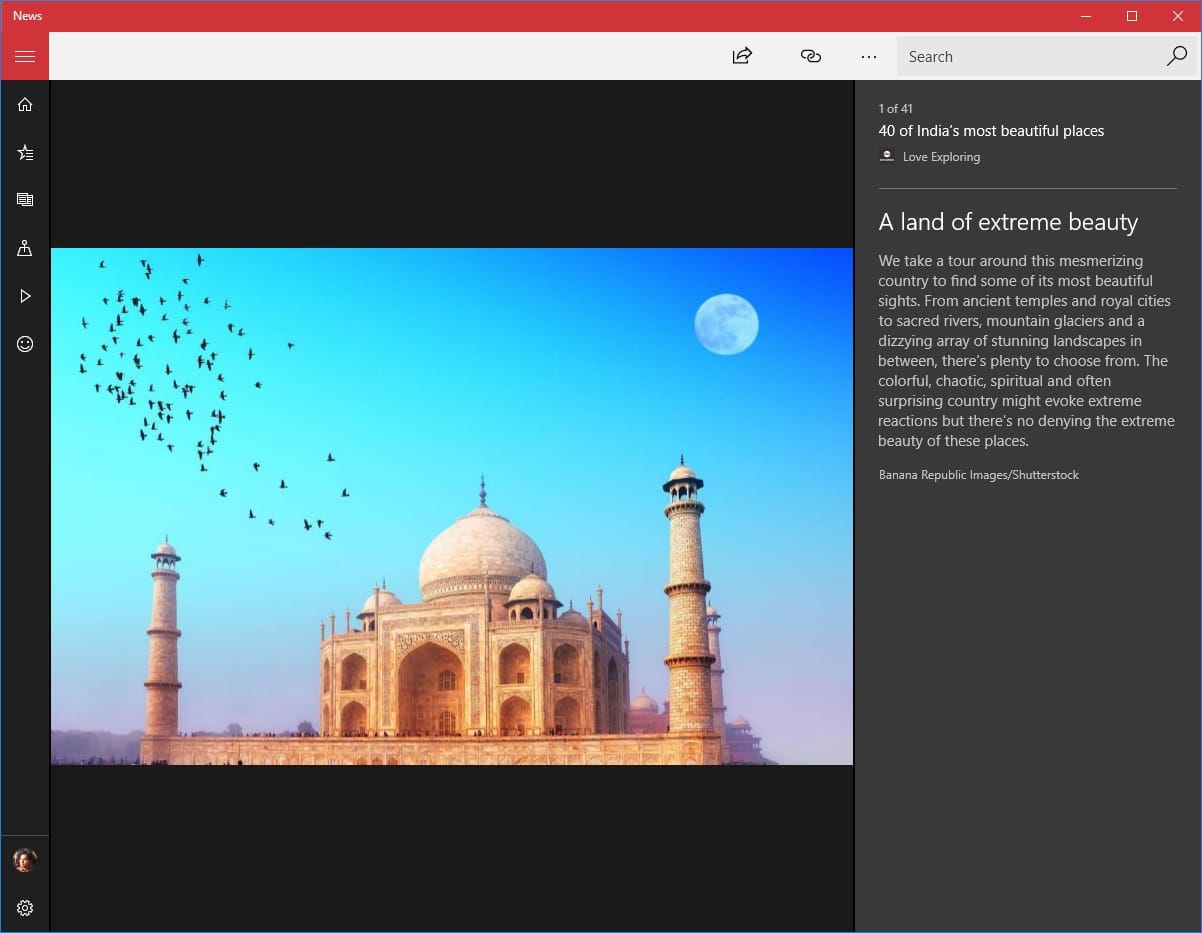
Add to this the fact that this works across your several Windows 10 devices and Timeline sounds even more impressive. However, the way Microsoft achieves this cross-device feature is by syncing the data about your activities to your Microsoft account. Everything that you do, will be monitored and synced across your devices. It isn’t hard to see how this can be a nightmare for privacy advocates. If Timeline sounds more like a privacy concern to you than a feature, Microsoft allows you to turn it off, fortunately for you. You can turn it off completely, or simply turn off the cross-device syncing. And here’s how you can do it.
Before we begin, it should be noted that Timeline is only available to users who sign into Windows using their Microsoft accounts. So if you use a local account to use your Windows 10 PC you have nothing to worry about.
Turn off the Windows 10 Timeline feature
- Open Settings.

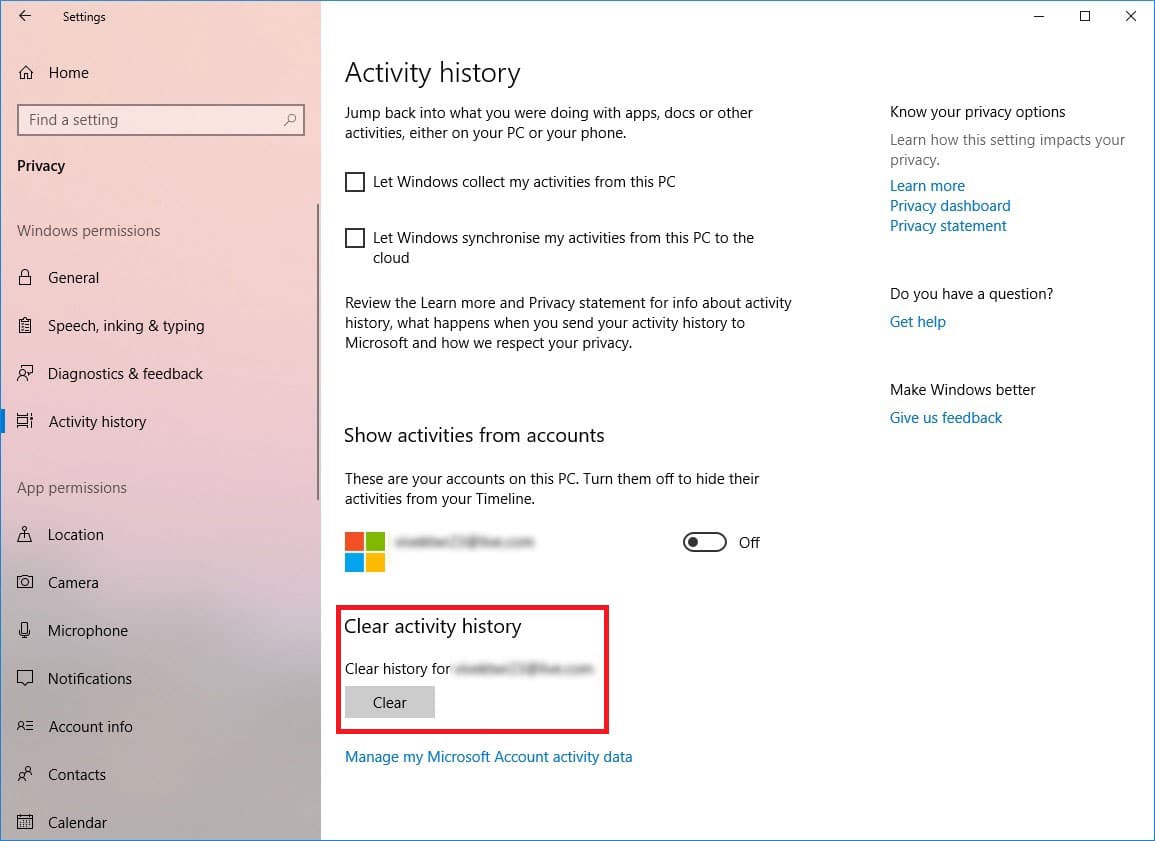
- Go to Privacy and click on Activity history under Windows permissions in the sidebar.
- Uncheck the Let Windows collect my activities from this PC option. Since Timeline is based on the collected activity history from your PC, this will disable timeline completely.
- Similarly, uncheck the Let Windows sync my activities from this PC to the cloud option. This will disable the cross-device syncing. Generally, this option is already disabled by default and Windows collects and keeps your activity history right on your computer.
- You may also want to toggle off Show activities from accounts located towards the bottom of the page.
- Once you’ve done this, switch to any other Settings page and come back to the Activity history page. You’ll now notice a new Clear button at the bottom.
- Click on the Clear button under Clear activity history to clear all the data already collected about your activity history.
- Click the OK button to confirm.


From then on, you won’t see the Timeline when you click on the Task view button. Instead, if you don’t have any running apps on your PC and click on the Task view button you’ll see the message Use your PC to see more activities here but no activities.