Microsoft has released Windows 10 with a major overhaul to both the design and functionality of the Windows PC environment. It’s been just a few months since its inception and it’s already rocking millions of computers and laptops all over the world. It packs a lot of new features such as a refined Start menu with the re-entry of the Start menu icon, Action Center, Cortana, the new and revamped Settings app, and many more stunning features. You must do the following 3 things after installing Windows 10 on your PC.
If you haven’t heard yet, Microsoft has provided Windows 10 as a free upgrade to the machines running on genuine Windows 7 or Windows 8/8.1 Operating Systems. Many of you might have already upgraded your PC to the latest version of Windows, so here are a few things that you may want to take care of after installing Windows 10 on your PC. If you’re planning to upgrade your PC to Windows 10, these tips will help you in taking care of some basic things like renaming your PC, retaining disk space after an OS upgrade, etc.
1. How to Rename your PC running Windows 10
Choosing the PC name has been one of the perks from the inception of Windows installations but for some mysterious reasons, some of the users couldn’t be able to do that on Windows 10. If you’ve performed a clean installation of Windows 10 on your PC, you might have noticed that there is no prompt to set the PC name. During the installation, the PC name will be randomly generated in some Windows 10 builds.
If you wish to rename your PC after the installation, here is a simple procedure for that:
- Click on the Windows Start button and select the Settings option. You can also press the ‘Windows + I‘ keys simultaneously to launch the setting windows right away.
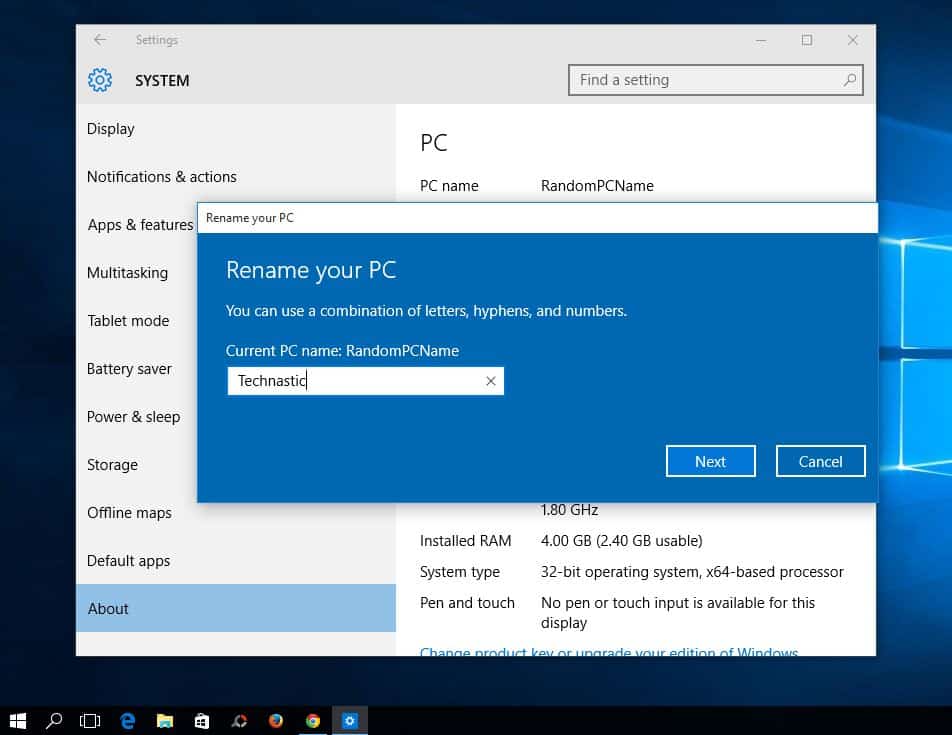
- Now select the System icon and click on the About option available at the last in the left side column.
- Now a new screen will appear with info like PC name, Organisation, Product ID, and some system specs.
- Click on the Rename PC button and type the new name of your choice in the dialog box.

- Once you have entered the desired PC name, click on the Next button. You’ll need to restart your PC for the changes to reflect.
In case if you have upgraded to Windows 10, then your old PC name will be retained after the installation, so you have one less thing to worry about.
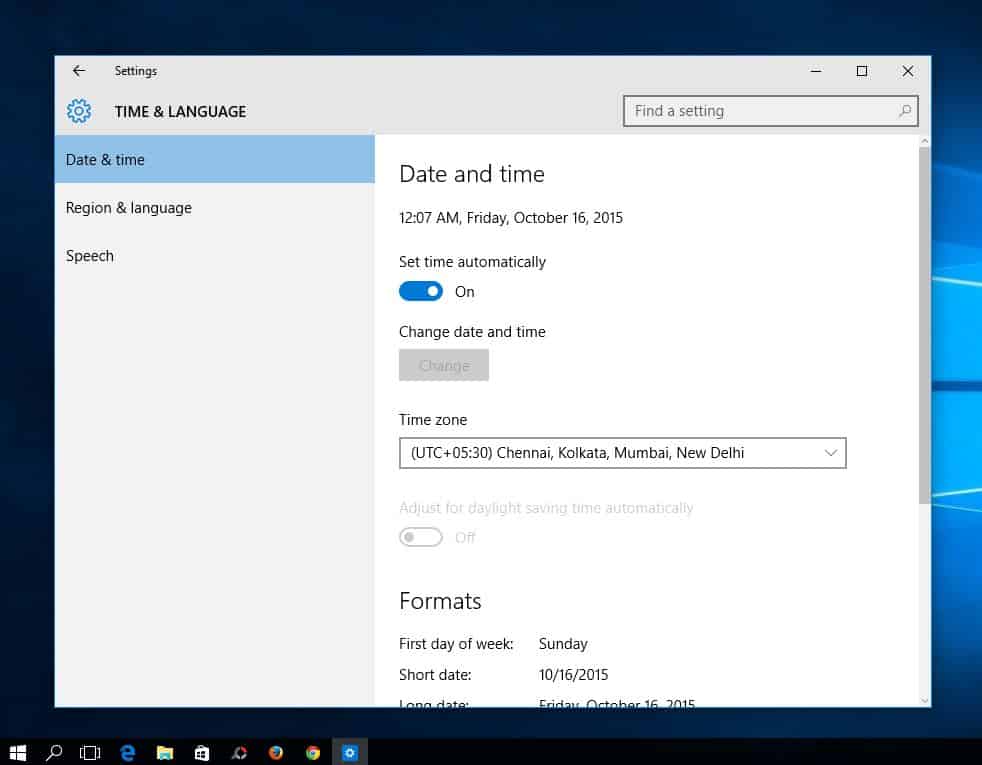
2. How to Change Date and Time
Time zone is one of the settings that are not available to configure during the OS installation process. Once you have installed a fresh copy of Windows 10, you should change the time zone as some of the apps and features won’t work unless you have the correct time zone configured on your PC. To do that, follow the below steps:
- Click on the Windows Start button and select the Settings option. You can also press the Windows + I keys simultaneously to launch the settings window right away.
- Click on the Time & Language icon and navigate to the Date and time page.
- Now choose your time zone from the list of time zones. That’s it.

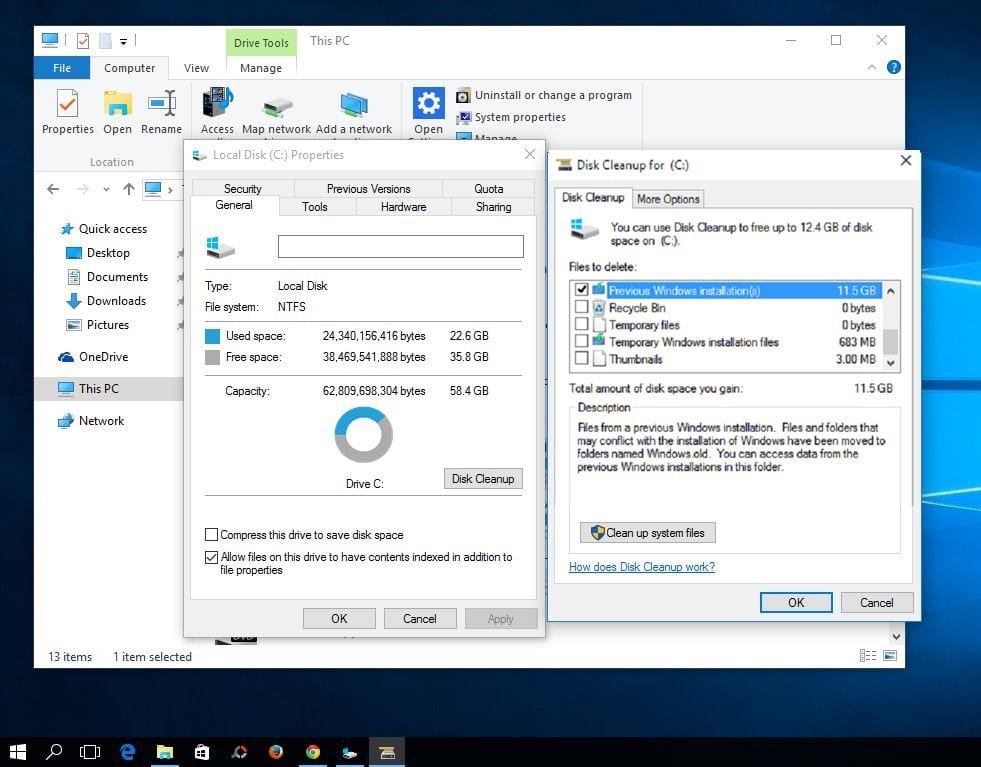
3. How to Recover Disk Space after Windows 10 Upgrade
If you have upgraded your PC to Windows 10 from an earlier version of Windows, you might have observed a huge chunk of space being occupied by a folder called Windows.old. This is a system folder that has all the roll-back files that are used to revert to your previous installation if you’re not happy with the latest update. However, if you have no plans to take a back step, you probably don’t want to lose 10-15 gigs of space.
Unfortunately, you can’t just delete the Windows.old folder that easily as many of the files will be left behind even after deletion. So, here’s a simple trick to reclaim the lost space on your PC.
- Click on the Windows start button and select the File Explorer option. You can also press Windows + E keys simultaneously to launch the file explorer window right away.
- Now go to This PC, right-click on the Local Disk(C:) drive and click on Properties.
- Then click on the Disk Cleanup button.
- Now, select the “Previous Windows installation(s)” checkbox and click “OK” button to start deleting the files.

It will take some time to delete all those files, so sit back and relax while your PC does the hectic work.
That’s it! Stay tuned to us for more tips and tricks on your favorite tech.