If you don’t play games on your PC, you may not know but there is a built-in recorder that you can use to record Windows 10 screen. You can press Win+G to call upon the game bar anytime, it has a record button on it. Unfortunately, it only works when you have a game open on your screen. It can also work with some third-party apps like Chrome if you tell it that Chrome is a game when it asks. This doesn’t work with all third-party apps and not with Windows apps or the file explorer. You can use a third-party screen recorder but you can also use VLC Media Player to record Windows 10 screen.
It’s not an ideal solution, of course, since VLC is a media player, not a dedicated screen recorder. Screen recording with VLC is simple but it does require a few clicks and steps and isn’t as simple as pressing a record button. It also lacks some of the advanced features that dedicated screen recording apps may have. For instance, it will record the entire screen, you can’t select only a part of it to be recorded. Similarly, you can’t add annotations, text, or voice.
But if you aren’t broadcasting your screen or anything, and only need to record it occasionally, VLC can be quite handy. First of all, you don’t need to install another software or app. Yes, VLC is a third-party tool too but honestly, who doesn’t have it installed already? It’s by far the most popular media player around on any platform or OS. The fact that it also lets you record your screen is one of the many bonuses that come with it. VLC Media Player saves the screen recordings as an MP4 file by default.
If somehow, for some reason, you don’t already have the VLC Media player installed on your PC, you can visit the link below and download it.
Record Windows 10 screen with VLC Media Player
- Launch VLC Media Player.
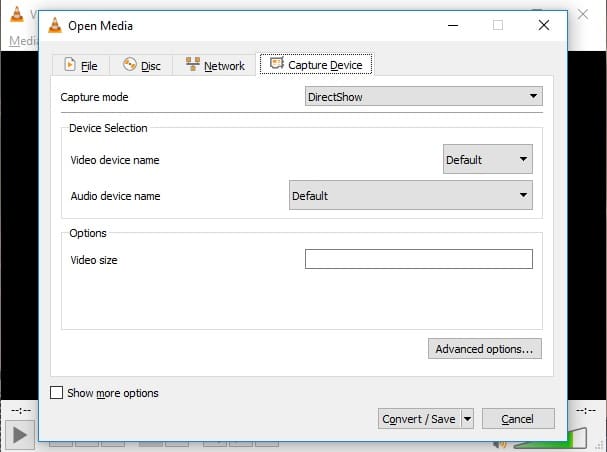
- In the menu bar click on Media and select Convert/Save.

- Head to the Capture Device tab and select Desktop as the Capture mode from the drop-down menu. Select the framerate at which you wish to record the screen, 60fps should be much more than enough. You can try 24 fps, which is the frame rate used in many movies. Anywhere between 5 to 15 fps should be decent enough though and you probably don’t need to go higher.

- When you’re ready, click on the Convert/Save button.
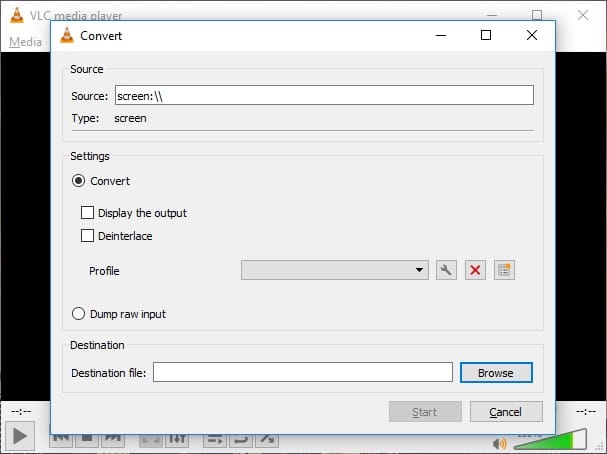
- This will open another dialogue named Convert. Here, click on the Browse button next to the Destination file field and select a location to save the recording. Also, give the file a name and then click Save.

- When you’re ready, click on the Start button and VLC will start recording your screen. Everything on your screen will be recorded, just as you see it, except the cursor. You won’t see any notifications or indicators telling you that the screen is being recorded.
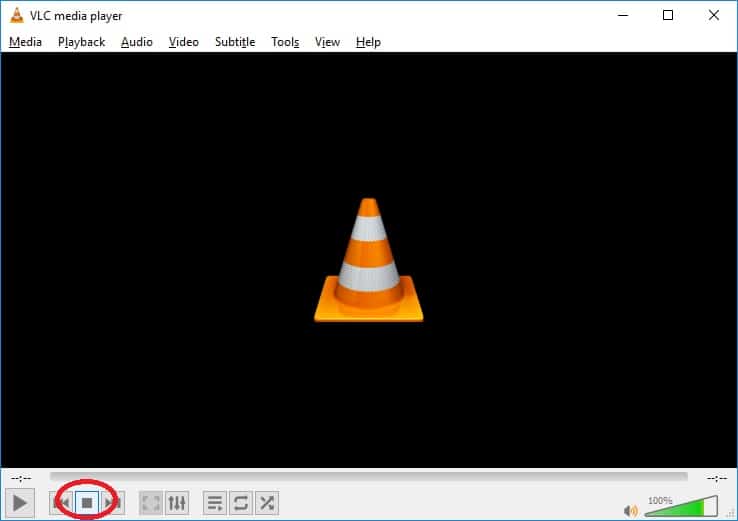
- When you want to stop, just click on the Stop button in the VLC Media player.

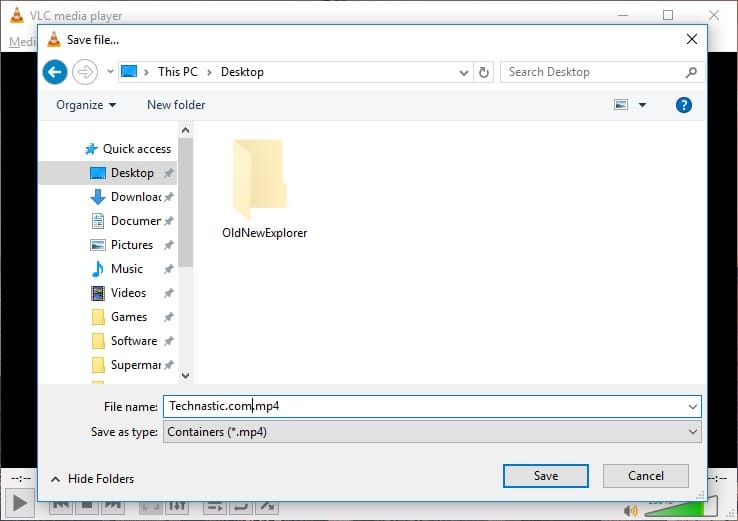
The screen record will be saved in your chosen location, with the file name of your choice.
Don’t miss: Install and Apply Third-Party Themes on Windows 10