There are quite a few ways you can install Ubuntu on your Windows PC. You can always wipe it entirely and install Ubuntu, thus losing the Windows part of your PC. You can install Ubuntu in a dual boot setup that lets you choose between Windows or Ubuntu at the time of boot. Thanks to Microsoft’s efforts you can now also install Ubuntu on your Windows 10 PC via the Microsoft Store. However, this will only install a command-line version with all the command-line tools and utilities. Of course, Redmond won’t want to help you in switching the OS entirely. Another popular way of installing Ubuntu is in the form of an Ubuntu virtual machine.
There are some advantages and disadvantages to this method. First, if you install Ubuntu as a virtual machine, you don’t have to make any permanent changes to your computer. It is basically like installing a big AAA game, only a little more complicated. You can uninstall it just as easily as you uninstall another app. However, this means you’re running an operating system, within an operating system. Windows 10 is already using up your RAM and processor power, and when you run the Ubuntu virtual machine that too will need some resources and RAM. Therefore, this isn’t exactly an ideal solution if you want to use Ubuntu for some serious work. If your usage of Ubuntu is only very limited an Ubuntu virtual machine is perhaps the most comfortable choice.
Requirements
We’ll try to make the process of installing an Ubuntu virtual machine a little easier for you. But there are a few things you will require before you can start.
- Virtual machines can be created using software tools designed for this. Some of the popular options include VMware and Virtual Box. In this tutorial, we will be using Virtual Box because it’s free and open-source just like Ubuntu. Also, it’s better. You can download it using the link in the Downloads section below.
- You’ll of course also need a copy of Ubuntu to install Ubuntu. Ubuntu is available to download for free on its official website. You can download it using the link in the Downloads section below.
Downloads
- Virtual Box (Select Windows hosts)
- Ubuntu ISO (Select any version of Ubuntu you want. We will be using Ubuntu 17.10 in this tutorial, however, the steps apply to any version of Ubuntu)
How to Install Ubuntu Virtual Machine on Windows
There are other ways to enjoy dual OS on your Windows PC. One of them is by creating a bootable Ubuntu flash drive and you can learn how to do that by heading over to our tutorial.
Install Virtual Box on your PC. This isn’t exactly a difficult process. Just double-click on the downloaded EXE file click on Next and Install wherever asked.
Create virtual machine
- Once you have it installed, start Virtual Box and click on the icon that has New under it.

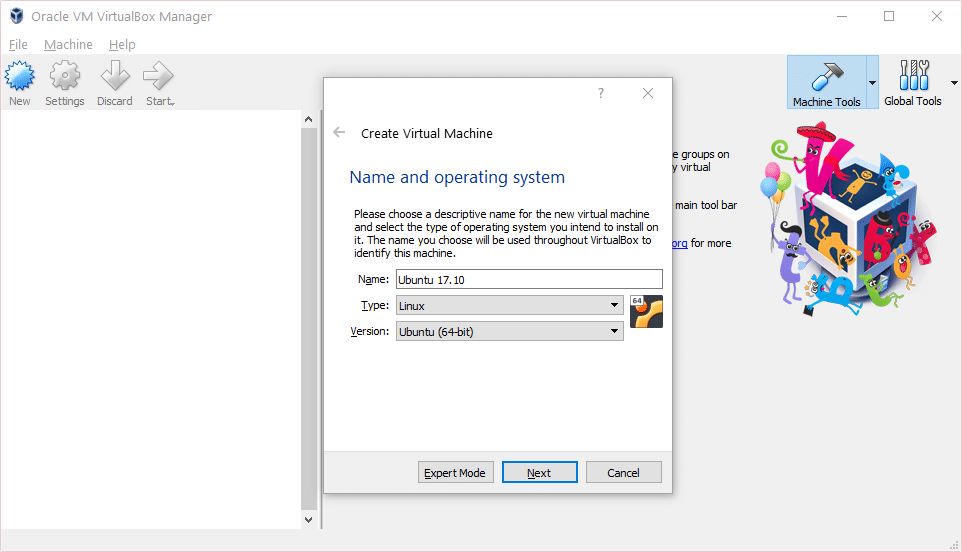
- Virtual Box will already know that you want to install 64-bit Ubuntu Linux because it’s just that good. Give your machine a name and click Next.
- You’ll now be asked to allocate RAM to the machine. Depending on how much RAM you have you can give it anywhere between 2 GB to 4 GB or even 6 GB. However, 4GB would be more than sufficient. make sure you don’t end up allocating all your RAM because Windows needs some of it too. Click Next when you’ve allocated the RAM.
- Next, you will be asked which method to use to provide a hard disk to the Ubuntu virtual machine. Create a virtual hard disk now is pre-selected, so simply click Create.
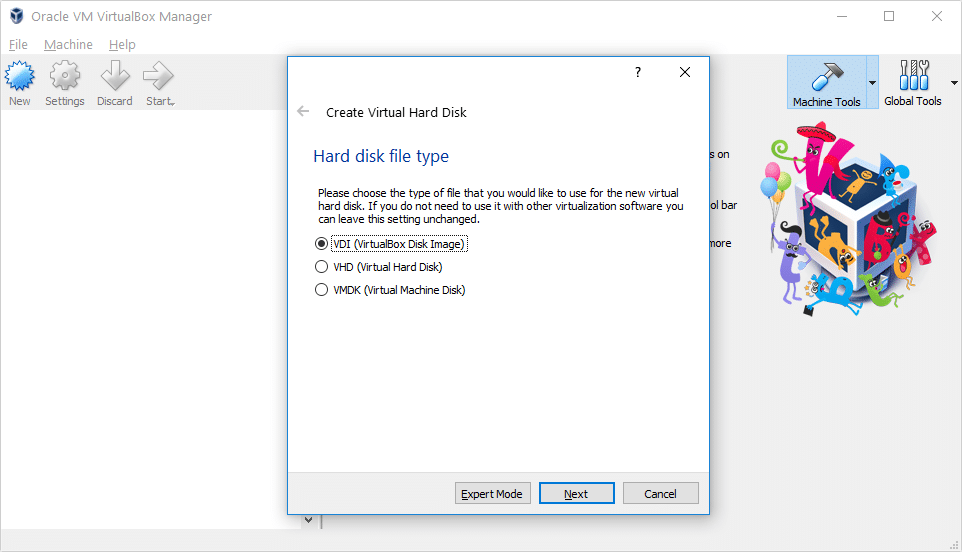
- Since you won’t be using this Virtual Machine with any other software select VDI in the next step and click Next.
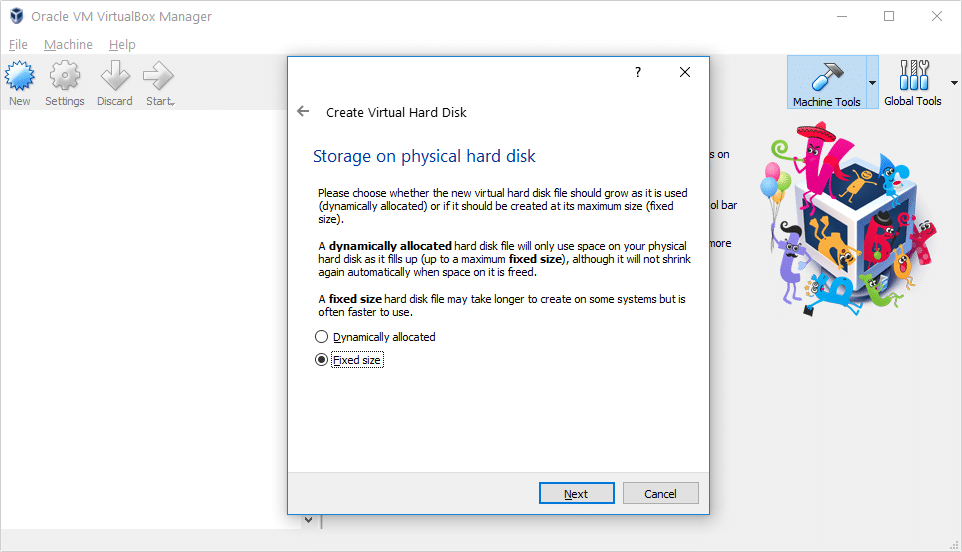
- Now you’ll need to select whether the hard disk is Dynamic allocated or given a Fixed size. What these mean is explained right there and either of the options works fine.
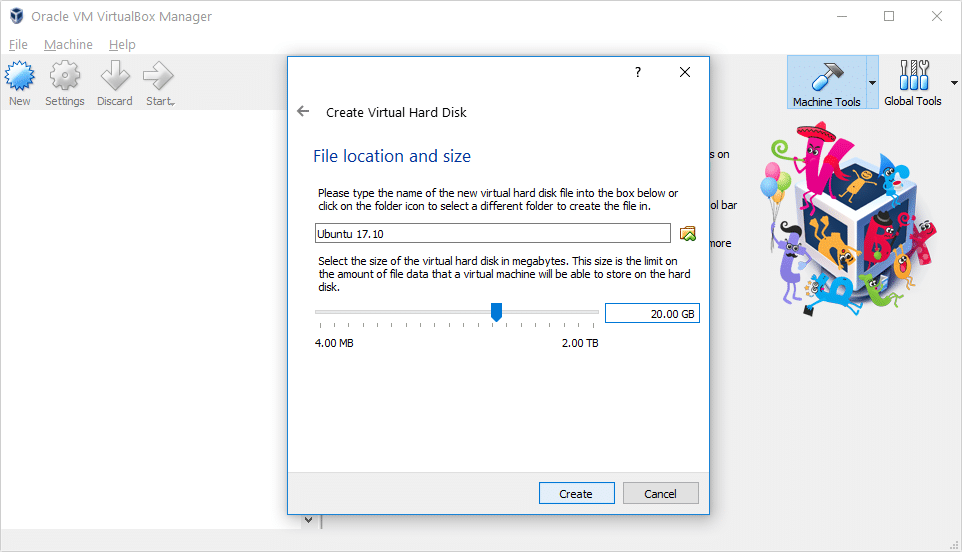
- The 10 GB size recommended by Virtual Box is sufficient, but not enough. If you have enough space available, give it at least 20GB. and click Create. Creating the virtual hard disk can take some time depending on your choices and your hardware.

Install Ubuntu
- Once the virtual machine is created, it is time to load up and install Ubuntu on it. To do this, either double-click on the newly created machine or select it and click the Start button.

- Click on the folder icon and select the downloaded Ubuntu ISO image then click Start.
- The machine will boot up Ubuntu normally as it would boot up on any PC and you can then select whether to Try Ubuntu or Install Ubuntu. Select Install Ubuntu.
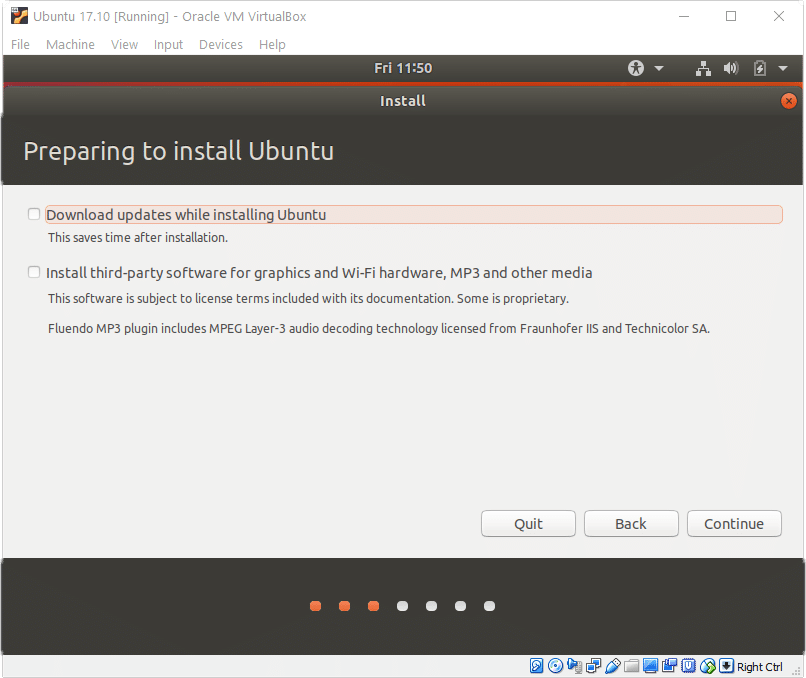
- Read the available choices on the next page and check the ones you want, then click Continue.

- Select Erase disk and install Ubuntu in the next step This is safe for the Virtual Machine and will not really wipe anything. Click Install Now and Continue.
- From here on, the steps are quite self-explanatory and all you have to do is make some choices and click Continue.
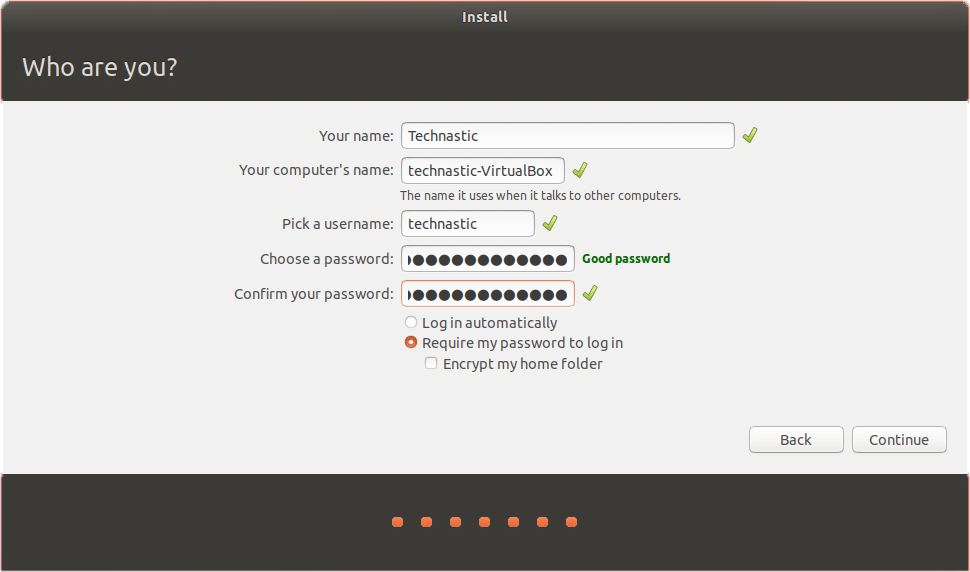
- Provide a username and password in the last step and click Continue again. Ubuntu will now be installed on the virtual machine and it can take a while, again, depending on your choices and your hardware.

- Click Restart Now when the installation is complete. If the machine does not automatically restart, just close it and start it again.


Read Next: How to Run Windows Programs on Mac and Linux