Is Ubuntu the best Linux distribution? That’s debatable and many Linux enthusiasts may strongly disagree. But Ubuntu is by far the most popular Linux distribution. Ubuntu uses its own Unity desktop environment which is not very different, but quite different than Gnome. Users who have at one time tried Ubuntu in recent years might not be as familiar with the Gnome Desktop. They might not even be aware that pre-2012 Gnome 2 was the default desktop environment on Ubuntu.
Six years later, Ubuntu 17.10 is going back to Gnome. This time though the default desktop environment is the new Gnome 3. Unity was good, for the most part, but Canonical won’t be developing it any further and any newer versions of Ubuntu will ship with the Gnome 3 desktop environment. Now would be a really good time to get to know Gnome 3 and its plethora of extensions and here’s how to install Gnome Shell Extensions.
Extensions?
Yes, the Gnome desktop supports extensions much like your web browser does. For instance, say you install a YouTube downloader add-on on your browser to download videos from YouTube. This functionality wasn’t originally present on your web browser but thanks to a third-party developer, it is now.
Similarly, Gnome extensions are small pieces of code that enhance the functionality of the Gnome desktop. Unlike Unity’s app indicator, Gnome’s extensions aren’t simply indicator icons at the top of your screen. They can be that but they’re also much more than that. This is why you will find several Gnome extensions that are visible in the top bar while several others that are not. Some Gnome extensions will provide you with an interface to change certain settings while some extensions can maximize its functionality.
How to install extensions
Installing Gnome extensions is as easy as installing browser extensions or in fact, even easier since they are so small it’s almost instantaneous. Ubuntu and many other Linux distributions already provide a small set of extensions as gnome-shell extensions. These are included in the repositories but have to be manually installed. Once installed, extensions can be enabled using the Gnome tweak tool.
Preparations
First things first though, you need to install the Gnome Tweak Tool. Gnome Tweak Tool isn’t exactly necessary to install Gnome extensions but you probably should install it anyway.
To install it, simply copy and paste the command below in Terminal. Make sure you have enabled the universe repository already.
sudo apt install gnome-tweak-tool
It will also help if you know your Gnome shell version because the compatibility of extensions is determined by your Gnome shell version. To know your Gnome shell version enter the command below in a Terminal window.
gnome-shell --version
Install gnome-shell-extensions package
Once you have the Tweak tool, use the following command in a Terminal window to install the gnome-shell-extensions package we mentioned before.
sudo apt install gnome-shell-extensions
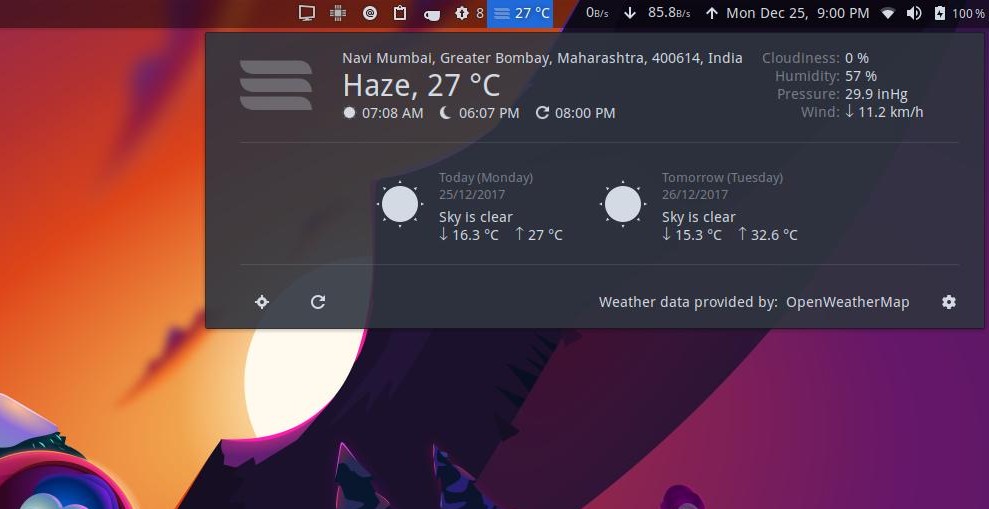
With these extensions, you don’t have to worry about compatibility because your Linux distribution takes care of all that. Once installed, you can find about 8 to 10 extensions in the Extensions section of the Gnome Tweak tool.
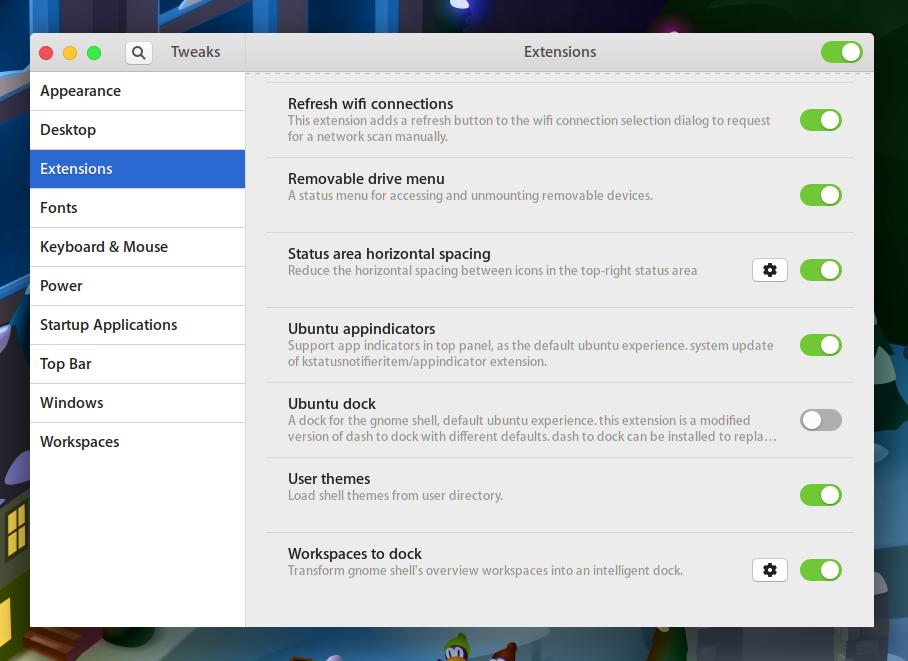
To start using an extension just toggle it on. Also, you may have to toggle on the master switch at the top in case it isn’t already. You’ll not exactly find all of the extensions you see in the screenshot above in the gnome-shell-extensions package. Because obviously there are a lot of other extensions out there that we haven’t talked about yet.
Install Gnome shell extensions from the website
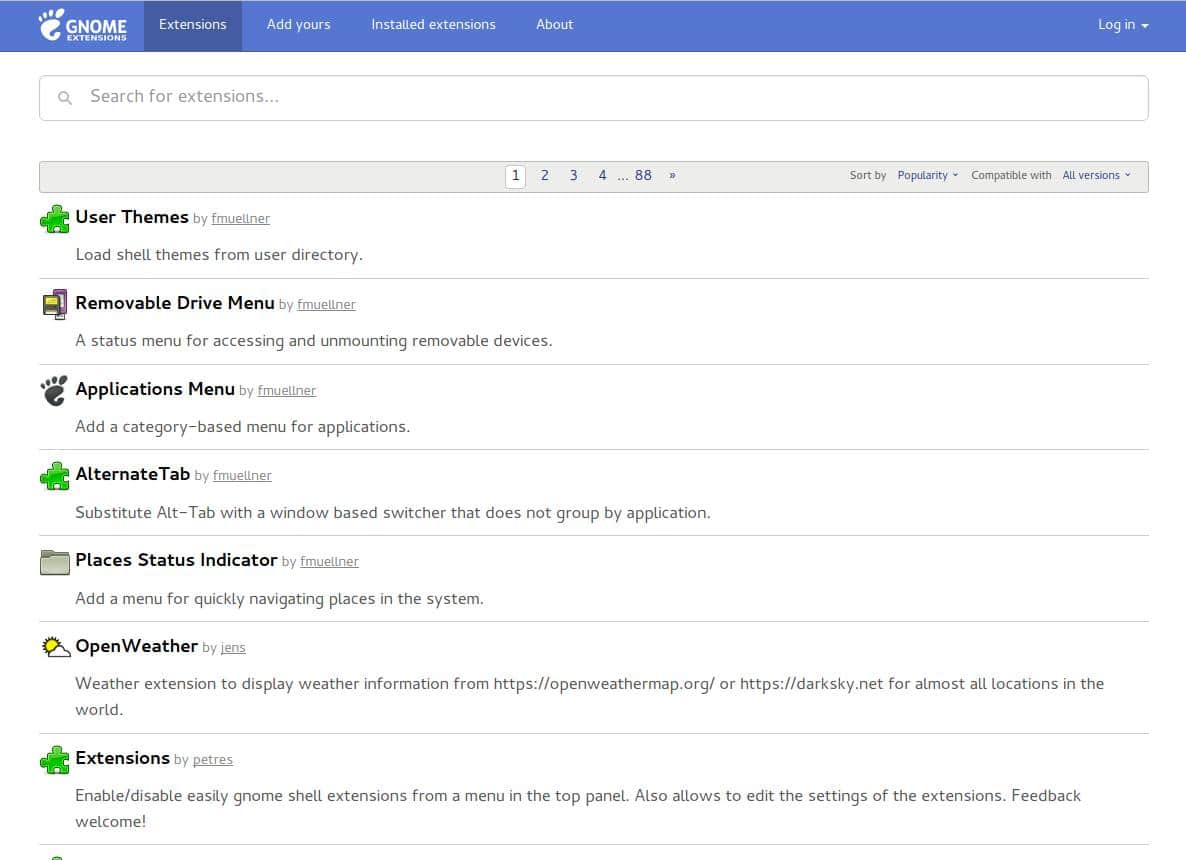
The Gnome project has an entire website dedicated to Gnome shell extensions which is how it should be. It’s a one-stop-shop for all Gnome extensions except you don’t really have to pay. You can simply toggle on extensions on the website to install them and toggle them off to uninstall them. Yes, you don’t need the Gnome tweak tool after all, not for managing extensions. But it sure makes itself pretty useful elsewhere.
To get started with installing extensions from the Gnome shell extensions website though you will need to install a couple of things first. These would be a browser add-on and a native host connector in your system.
- Gnome shell extensions website: extensions.gnome.org
Browser add-on
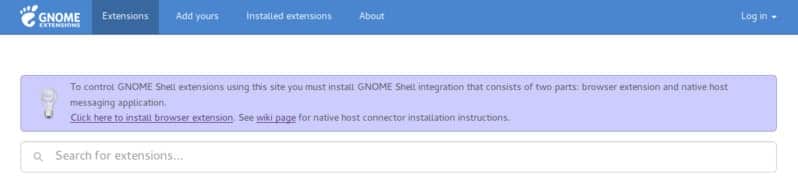
When you visit the Gnome Shell extensions website you will see a message that says, “To control GNOME Shell extensions using this site you must install GNOME Shell integration that consists of two parts: browser extension and native host messaging application.”
Click on the link that says, “Click here to install browser extension” and the respective browser extension for your browser will be installed. Alternatively, you can install the add-on using the following links.
Host connector
If you were to visit the Gnome shell extensions website again it would tell you that while the extension is installed, the host connector isn’t. You can install the host connector using the following command in the Terminal.
sudo apt install chrome-gnome-shell
That’s pretty much it. You can go to the website now and go on an extension installing spree. Keep in mind though that you have to be careful here and only install extensions that are compatible with your specific Gnome shell version. Incompatible extensions can cause problems. To install an extension, simply click on it to visit its very own web page and toggle it on.
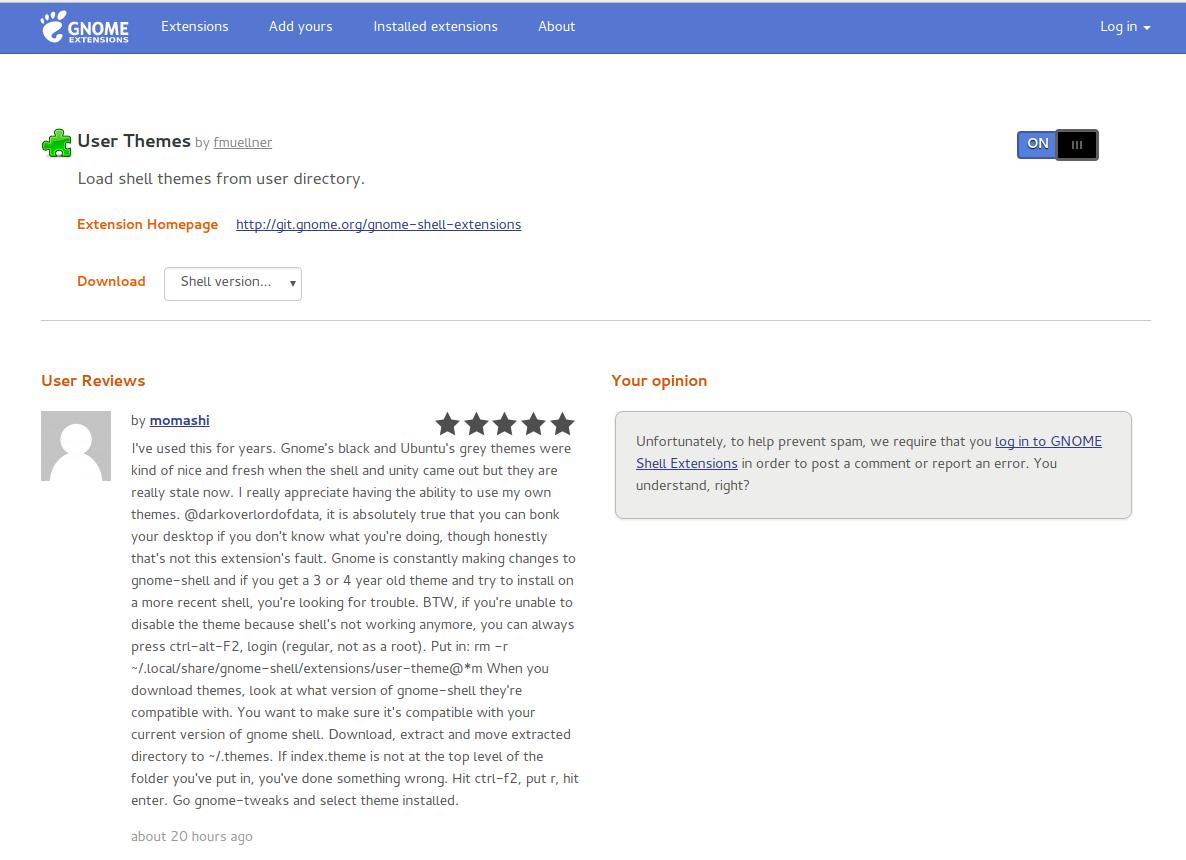
Popular extensions will also have some user reviews that can be helpful.
Read Next: Download macOS Mojave GTK Themes for Ubuntu