VLC is the most popular Open Source media player which is well-known for its wide range of features and compatibility to various media formats. Almost every Windows user uses VLC player as the default media player after ditching the pathetic Windows media player. However, only a few people are aware that your beloved media player VLC can even record the desktop without the need for additional plugins or software. Yes! you heard it right. You can record desktop screen using VLC media player.
You can record your screen in the desired media format with the required frame rate. We accept that there is much software available in the ocean of the internet that can accomplish this job and many of them have some pretty advanced features as well. But you must remember that VLC is absolutely free and you don’t need to install any new software on your PC just for recording the screen occasionally. So, let’s have a look at how to record desktop screen using VLC media player. Besides, you can also play YouTube videos in VLC Media Player.
How to Record Desktop Screen Using VLC Media Player
- Open VLC Player on your PC.
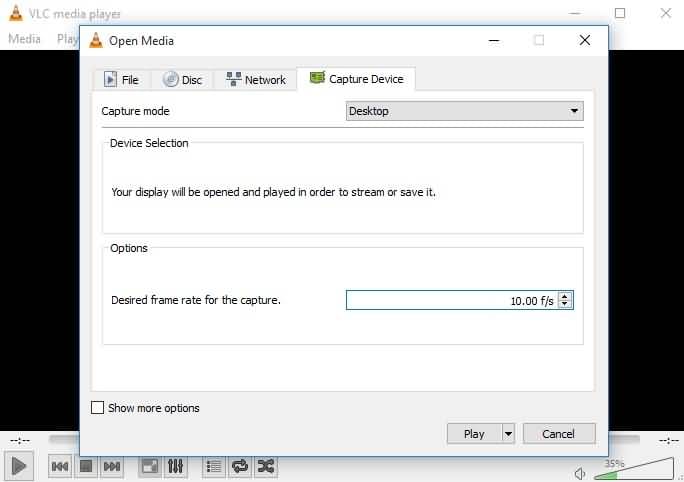
- In VLC player, open Media settings and then select Open Capture Device. You can also press ‘Ctrl + C‘ in VLC to open the capture device.

- A dialog box will open once you select the open capture device. In this window, set the capture mode to desktop and frame rate to 10-20 FPS(You can choose the desired FPS).

- Click on the Play drop-down button which is present at the bottom of the capture device window. Choose Stream from the list of available options.

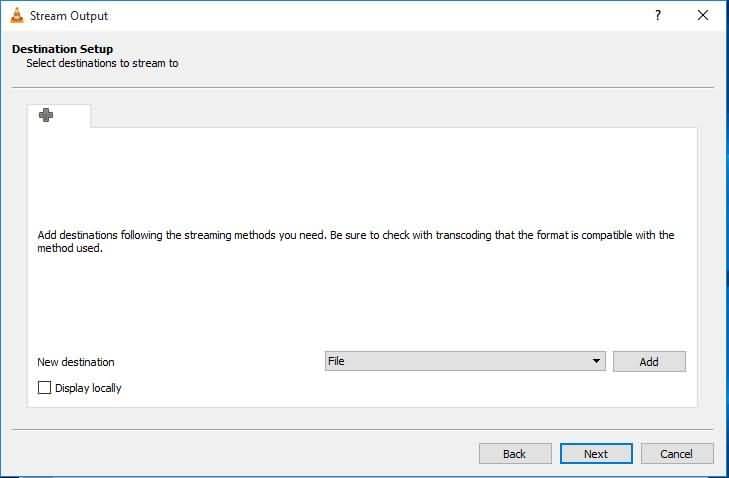
- A stream output wizard will open to mention the source. You can leave it intact, so hit Next.
- Now in “New destination” make sure “File” is selected and then click on Add.

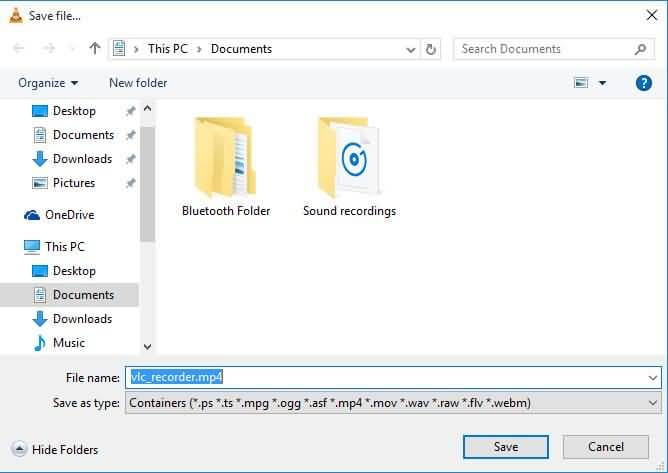
- Browse to the location where you want to save your output file and enter the file name completely with an extension (Eg. vlc_recorder.mp4).

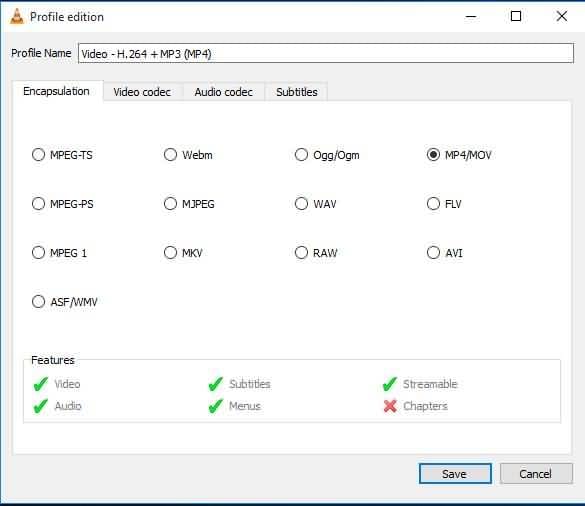
- Under the profile choose the video format, container and click on the Next button. Choosing the default H264 video format with MP3 audio is a wise choice.

- Now click on the Stream button to start the recording. Minimize the VLC player and continue with your work.
- Once you are done with the recording click on the Stop button in the VLC player to stop recording.


Isn’t easy to use VLC to record a desktop screen? Let us know if you found this simple tutorial useful. If you want to, you can remove the VLC option from the right-click context menu on Windows pretty easily.
Read Next: How to Install Windows Media Center on Windows 10