.NET Framework (dot net) is a Microsoft developed software Framework. It provides language interoperability across different programming languages. This Framework is necessary too for the programs which require .NET Common Language Runtime. The requirement of Framework version depends on the program. Installing windows OS from 8 and later will disable few of the Framework versions which are necessary for few programs and software. In this article, we will provide two methods for installing .NET Framework 3.5 on windows OS by offline and online.
If your OS is not loaded with .NET Framework 3.5 you will receive an error message saying “An app on your PC needs the following Windows feature: .NET Framework 3.5 (includes .NET 2.0 and 3.0)” while running the program/Software. You can install this Framework by downloading from the internet using windows features or install using OS installation CD or setup files.
Installing .NET Framework 3.5 from the internet:
Windows user can verify the .NET Framework 3.5 feature is enabled or not from using Control Panel.
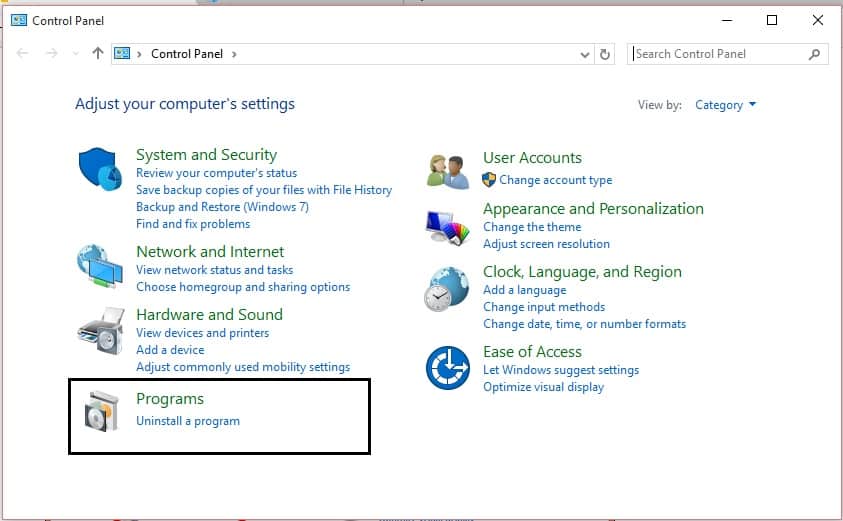
- Click on Windows icon and type Control Panel in the search field.
- Open Control Panel and Click on Programs.

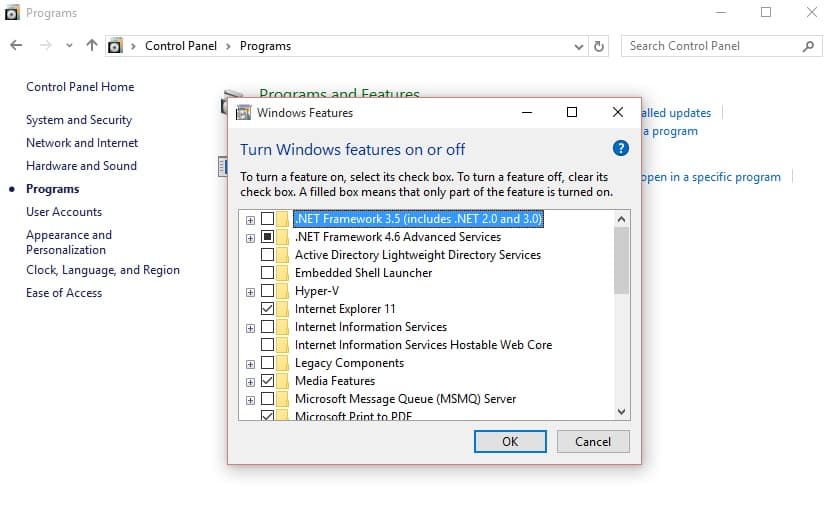
- Now choose Turn Windows features on or off under Programs and Features.
- Now all the installed and available programs windows will populate. Here, look for .NET Framework 3.5 and verify whether it is enabled or not.

- If you find the feature is disabled, click on the Checkbox and Click on OK.
- Now it will search for the files over the internet and will install it automatically if you have a proper internet connection.
Installing .NET Framework 3.5 from Setup file using Command Prompt:
.NET Framework 3.5 is available in the OS setup load. You can install it by executing the following command.
- First verify the feature is enabled or not in the Programs and Features.
- If it is disabled, now insert the OS Setup CD or chose the Setup File path.
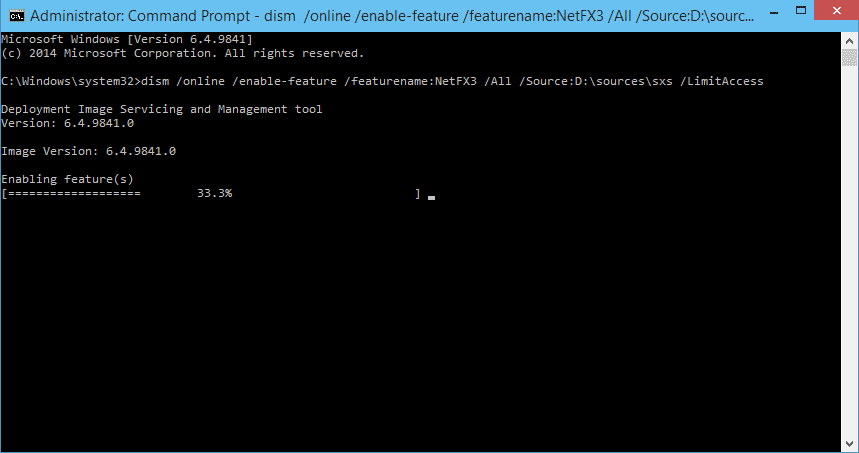
- Open Command Prompt and run it as administrator.
- Now type the following command in the Command Prompt. Dism.exe /online /enable-feature /featurename:NetFX3 /All /Source:E:\sources\sxs /LimitAccess
- Here E:\ is the OS setup load drive. Replace the drive name with respect to your drive.
- Now hit Enter it will fetch the components from the load and install it automatically.

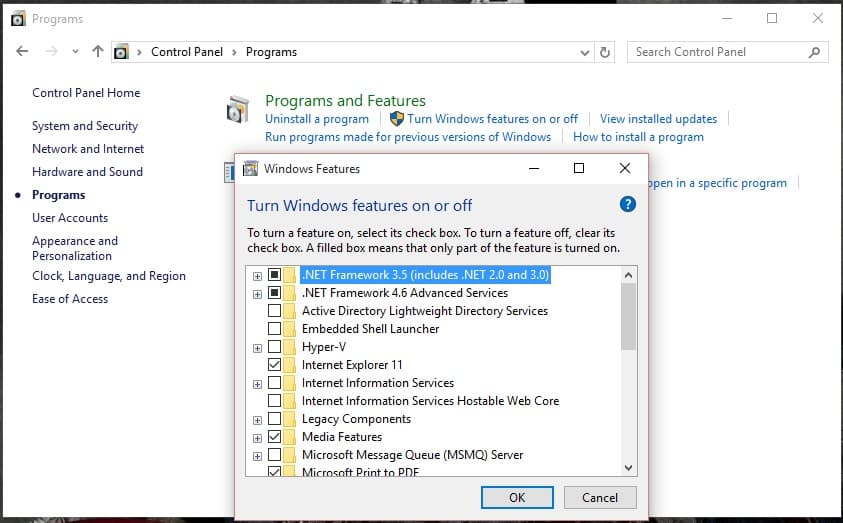
- You can verify the feature is installed or not in Programs and Features

That’s it. Hope you got how to install .NET Framework using both online and offline methods. If you have any issues do share your comments below.